Wednesday, April 30, 2008

WINDING CONES: HAVE I FOUND THE SECRET?

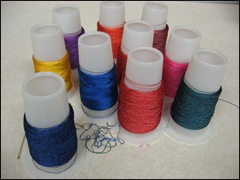
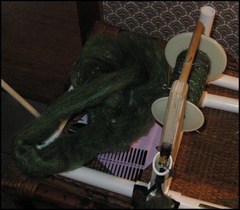
I am done winding the cones.

I wish I could say that I had only one awful skein. I wish I could say that after that one awful skein, cone winding went utterly smoothly. T'wasn't so.

ANOTHER SKEIN FROM YOU-KNOW-WHERE

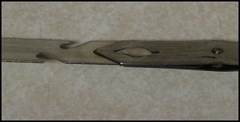
A number did go fairly well, but there were others. One skein in particular gave me terrible grief. Every time I hit a snag (which was constantly) I tried to figure out what the cause was. When I placed my hand under the skein and looked really carefully and moved yarns about, it was clear that yarns were just continuously twisting around each other.

SILK ORGANZINE AND BOMBYX SILK

Thanks to my hunches and to Dot's carefully researched post on silk which confirmed my hunches, I figured it was the nature of the yarn. The organzine is a very tightly twisted yarn which easily plies back on itself and which also engages in excessive twisting with its neighbors.

This twisting (but not the plying back) happens with the 60/2 bombyx silk. It was quite evident as I was doing the preparations for warping the loom and also warping the loom. So if I am not careful in making the skeins of bombyx silk, I will have the same problems i have been having with these skeins of silk organzine.

But I was very careful making these skeins and the snarls and snags still happened!

STRENTH OF SILK ORGANZINE

One interesting difference, back in the days when I didn't know a thing about silk and I had so many problems with snags, the silk also frequently broke under the tension. No breaking with the organzine. Again, Dot's research confirms the strength of the silk organzine.

It is some small comfort that the yarn was not continually breaking.........

CHANGING ENDS

Anyway, I was having so much trouble with this particular skein that I decided to cut the end I was using, attach it to the other end and try it from there. Spinners do that when they have trouble with a roving. Why can't I when I am having trouble winding cones? Also I had done this with an earlier skein and it had seemed to help.

Well, it helped this time too. The rest of the winding the cone went quite smoothly with only the occasional snag.

Is there something to this difference? I really don't think it had anything to do with the smoothness/direction of the yarn as spinning of roving does. But I did notice something interesting.

WHICH END TO UNWIND FROM?

When you make a skein, you tie the beginning of the skein to the end of the skein. When you get ready to make a cone from it, you cut the tied ends and choose one of those ends to unwind from.

I had already figured out that it didn't matter which way the skein winder turned. So there was no reason for choosing one end over the other on that basis. But then I saw another basis for choosing one end over the other.

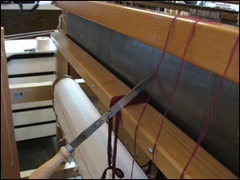
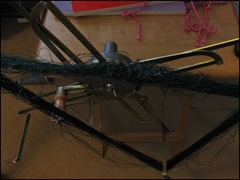
When I was having so much trouble, I was unwinding from the part of the skein that was farthest away from me and closest to the body of the skeiner. When I changed to the other end, I was unwinding from the part of the skein that was closest to me.

SMOOTH UNWINDING

I had two more skeins to unwind. Each of them I unwound with the end closest to me. In both cases the unwinding went smoothly with only an occasional snag..............

Related Posts:
Winding Cones
That Badly Snarled Skein of Yarn
Preparing the Warp Bouts for the Loom
Twist at Lease Sticks
Winding on the Warp

© 2008

Tuesday, April 29, 2008

SOLITUDE: FINDING ONE'S OWN WAY

Robert Genn replied to a question from a woman who felt that it was time for her to leave the group she painted with and move out on her own. Genn talked about the difficulty of doing this, suggested ways on how to do it, and concluded with this paragraph:

Ideally, you ought to have an audacious understanding of your own direction. Successful loners are folks who are able to find out what turns them on and how to become their own best critics. The private studio becomes the school, the clubhouse
and the laboratory. Setbacks can be expected, but graduation ceremonies will take place every day. Self-anointed diplomas
will be issued frequently
."

When we moved to South Carolina I was forced to shake off the comfort of the group, that group being the Chattahoochee Handweavers Guild in Atlanta. It is a wonderful group and I grew, as a weaver, by leaps and bounds during my five or so years there.

When we moved to South Carolina, I looked for a similar group close by but found none. I did find a small group in Charleston, The Palmetto Fiber Arts Guild. Charleston, however, iis over two hours away. I really wanted to help them grow, but the distance just made it impossible.

After a time I began to realize that as a weaver I had been changing and growing in my solitude, and that what was happening was good, and I was happy with what was happening. I realized that moving had forced me to do what I would never have had the courage to do on my own. The separation from the group had, in essence, forced me to develop that necessary "audacious understanding of [my] own direction."

To read Genn's entire piece, called "Voluntary Graduation," go here.

Related Post: Evaluating Art

© 2008

SLEYING THE REED

AVL Patent Denter side 1

The reed is an18-dent reed so I am using a special tool for sleying. It is the AVL Patent Denter. Here in the first picture you see one side.

AVL Patent Denter side 2

Here in the second picture you see the other side. In this picture, the tip of the denter is facing up. In the previous picture it was facing down.

AVL Patent Denter Closeup

In this third photo you see a close-up of the working area. The slots in the left are where you lay the warp ends to be pulled through the reed. Just to its right is the tip of a triangle. This tip creates the magic that allows the denter to move automatically to the next dent. When you push the denter through the reed, you apply just a bit of pressure and that tip splits and goes through the next dent, the rest of the tool still going through the original dent. When you grasp the warp ends and pull the tool through, it is the dent to the right that the tool comes through. Each time you sley another set of ends, the tool automatically moves to the next dent, assuming you have applied the right pressure.

There is a learning curve. But when you are talking about going blind sleying an 18-dent reed, or even a 15-dent reed, it is a life saver.

Sleying Reed Side View
Here is a picture of the denter at work. I have three groups of warp ends (four ends in each group) sitting on top waiting to be sleyed. Normally I hold those ends in my left hand. Each group lies within a different set of two fingers. I cannot seem hold those ends in my left hand and manipulate the denter. So I space them out across the top of the beater.

For more information about the denter, including complete instructions on how to use it, go to the AVL web site.

Related Post: Sleying the Reed

© 2008

Monday, April 28, 2008

SILK YARNS

Some dyed silk organzine on cones

Cones of Silk Organzine Wound To Date

DOT'S FIBRE TO FABRIC

If you have even only the vaguest interest in silk, run, don't walk, to Dot's post on silk. And don't let the fact that she begins her post with a discussion of wool mislead you. Read on, and you will learn that Dot has culled out the best of the information from a number of important textile books.

SILK ORGANZINE

Among other things, she discusses spun silk and organzine, both of which I am currently working with. In response to her question, yes, bombyx is spun silk.

I am also delighted to have my experience with organzine validated. I had already figured out that it was a definitely over twisted yarn. When I let a loop of the yarn drop loose in the air, it really twists on itself. And that, no doubt, is what accounts for its very independent nature.

U.S. SUPPLIER

Moreover Dot is right about the rare availability of organzine. Here in the United States I am grateful to have a wonderful supplier: Habu Textiles.

SERICIN

Habu Textiles sells silk yarn both with and without sericin. And they also sell a degumming agent. There are times when leaving the sericin in the yarn is useful. But even in supposedly degummed silk, there is still a bit of sericin. How do I know? It smells terrible when it is wet!

THANK YOU!

Thank you, Dot, for taking the time to collect all this information and put it into readable form for the rest of us.

Friday, April 25, 2008

INTERESTING POSTS FROM OTHER BLOGS

Here are links to some posts I found of particular interest this past week.

FROM WEAVING BLOGS

The Studio in Progress
-- Sandra's Loom Blog
MTW - Rainbow Warp Revisited -- Leigh's Fiber Journal
Threading Error? -- Centerweave
The Red is Difficult and Makes me Slow -- Weaving Finlander
Organizing Projects -- Deep End of the Loom
sew : : weave The Daily Purl An older post but from a blog I just discovered.
Supreme Act of Courage -- Constance Rose Design
Finished -- A Movable Feast
Sampling -- Doni's Delis
Using Acid Dyes on Wool and Silk Yarn -- Dot's Fibre to Fabric
Palette Generators on the Web -- Weaverly

FROM OTHER BLOGS

Building the Creative Muscle -- The Painter's Keys
A topic of importance to weavers as well as to artists.
27 Thoughts on Blogging for the Artist -- Pro Blogger.
A great piece for any artist, including weavers, who blogs, wants to blog, is interested in blogging. It is a guest post from a poet by the name of Robert Bruce. It is a cryptic list of 27 tips. Here is my favorite tip from his list: "If you wouldn’t do it without an audience, don’t do it all." But do go and read them all.

Thursday, April 24, 2008

THAT BADLY SNARLED SKEIN OF YARN

Snarled mess on skein winder, overview

Bolstered by fairly easy cone winding so far, I decided to set my mind to that badly snarled skein of yarn I showed on an earlier post.

The picture here shows what that skein looked like when I finally got it onto the skein winder. But in case you want to see the picture of the skein itself again, just click on the Skeins Dyed hyperlink at the end of this post.

THE LEARNING BEGINS

The first thing I learned is that the skein would not fit on my LeClerc skein winder.

The next thing I learned is that I didn't have to wind it over all four arms. Three arms did just fine, thank you. So now I had a triangle instead of a rectangle.

I fussed around a bit. My fussing only convinced me that this was going to be impossible. Here is a close-up of what I faced:

Snarled mess on skein winder detail

I fussed around some more and removed the two figure-of-8 ties.

A LONG LOOSE END

Then I saw it. A long loose end hanging down to the floor. Oh dear. Where did that come from? I had no idea.

Instead of starting from the actual end or beginning of the skein, I decided to start with this loose end. This loose end that came from somewhere it the middle of the skein. I had no idea where.

Trying to unwind from that loose end was awful. I had to keep threading it in an out of messed up ends. Finally I had about a yard pulled out of the mess. I wound that onto the cone.

CROCHET HOOK TO THE RESCUE

I got out my trusty crochet hook and did some more playing with that snarled-up mess. I could hardly believe that that unwinding seemed to be improving. Slightly. Each time something improved, I could open the arms on the skein winder a tiny bit more. Then I cut the end I had wound onto the cone, and threaded the other end in and out of various ends on the winder.

Until I began to realize that I didn't have to do this any more.

WINDING GETS EASIER

I learned that when I hit a snarl, if I messed a bit with the snarl, I could continue unwinding without threading the yarn through stuff. The snarling yarns just seemed to slip away from the unwinding yarn.

Having figured this out, I knotted the end to the end coming from the cone and wound on what I had unwound from the skein. Then I turned the skein winder with my left hand and at the same time used my right hand to turn the cone winder. Whenever I had a problem, I fussed with the other ends, and then continued winding. Slow, but it seemed to work.

ANOTHER LOOSE END

Then i saw another loose end.......... Oh dear heaven above, what now? I assumed it was probably the other end of the loose end that i was working with.

A HAPPY ENDING

To shorten a long, tedious story, the cone did get wound satisfactorily. Only two more times did I have to cut and retie. And it really take all that long.

I was pleased. After all, I had originally thought the skein was going to be a total loss!

Related Links:

Skeins Dyed
Winding Cones

Wednesday, April 23, 2008

WHAT SHALL I DO? 14 ENDS LEFT OVER!

Having ends left over is a rarity for me, though it has happened.

WHY  DID THIS HAPPEN?

This could have happened when I had to recalculate the number of ends in each warp bout.  The recalculations resulted in bouts with different numbers of ends in each bout.

ADD ANOTHER BLOCK?

I could add another block with 14 heddles.   But then I would destroy the symmetry of the design.  The threading, as designed, begins and ends with the same block.

In fact, the whole design is symmetrical.  The left half is simply a repeat of the right half, only in reverse.

CHANGES IN THREADING BLOCK WIDTHS

Ahh, but as I threaded I became aware of another problem.   Some of my blocks were a tiny bit shorter than most of the blocks. 

These discrepancies doubtless happened when I had to make some changes to the threading. I didn't want to change the number of ends I had planned on, so I needed to revise some of the threading to accommodate the difference. 

I thought that what I had done was simply to change the width of the center block. I did not, however, make notes of what I actually did, so I cannot reconstruct what I did. And so I cannot figure out where I went wrong. 

I, who always encourage other weavers to document EVERYTHING.............sob.........

UNDERSTANDING THE BLOCKS

Some of these variances are really minor, a matter of one or two threads. This suggests another reason for the discrepancies.  And I think this may be the real reason.

At the time I was designing the threading, I don't think I always clearly understood how one block moved to another.   Now (I think?) I  am clear on that issue.

DROP OFF THE EXTRA THREADS

So, what I shall do is simply drop the extra threads off the back beam.  And let them hang there.  That simple.

Related Post:  I Ought Not to Be a Weaver

Tuesday, April 22, 2008

SPINNING FOR WEAVING

GREEN WOOL FIBER

The green wool fiber Crosspatch Victoria in the Woodsmade by Crosspatch Creations arrived two weeks ago from The Bellwether. I finished up the orange fiber I was spinning and started spinning this.

I love this fiber It is made up of Corriedale crossbreds, tussah silk, and silk noils. Some of those silk noils are even orange.


WEAVING A SHAWL

I am beginning to think about weaving. Not the current crackle project but something quite different. I'm thinking about a shawl.

I want to combine this yarn I am currently spinning with the orange yarn I have just finished spinning (but have yet to ply).

COLOR-AND-WEAVE

I want to do some kind of color-and-weave with a twill warp. At first I had thought about shadow weave. I dearly love shadow weaver and would like to explore six- and eight-shaft shadow weave.

The problem with shadow weave is that it based on plain weave. Plain weave fabrics do not drape very well. Their drape can be improved by sett and beat as well as by yarn selection. But in essence, plain weave creates a relatively firm fabric. Twill drapes.

TWILL VERSUS PLAIN WEAVE

I could open up the plain weave sett to improve its drape. But then the resulting fabric becomes schlocky and threads will want to move around.

Since I want to weave a shawl (preferably) or a scarf, I really want a weave structure that will drape nicely but at the same time is not schlocky.

And there are all kinds of color-and-weave possibilities within a twill structure.

FAROESE KNITTED SHAWL

A couple of years ago I knit a Faroese shawl. The structure of the shawl creates a garment which is really all-bias and drapes beautifully around the shoulders. A woven twill shawl which is simply a rectangle will not drape this well. But it hopefully will drape more nicely than a shawl woven in plain weave.

So twill it will be.

.

Monday, April 21, 2008

USING LEFTOVER DYE MIX SOLUTIONS

CONSTANCE ROSE

Constance Rose dyes silk fibers for spinning. Then she spins the dyed fiber and weaves beautiful stuff with it.

Every time I see one of her dye jobs my heart aches. Here is one of here latest creations. The colors are absolutely gorgeous. And she uses up her leftover dye mix solutions!

USING LEFTOVER DYE

I usually have lots of leftover dye solutions. And I do have undyed fiber. Some silk, some merino. I think some other fibers as well.

Using these fibers in my stash as experiments with leftover dyes seems like a very good way to start playing.

Ironically, however, for the current warp I have been making close to the amount of dye that I need. When I finished dyeing the organzine silk yarn, i just threw out the miniscule remaining bits of dye.

The second scarf I am weaving will require more dyes. I think I shall try making more than I need. Then I can use the remaining colors for playing with the merino and silk fibers.

Here is another one of Constance's dye jobs. It is just so gorgeous.

Saturday, April 19, 2008

INTERESTING POSTS FROM OTHER BLOGS

Here are links to other blog posts I have particularly enjoyed this past week. But first, do check out Leigh's revised blog. Modestly she says she has tweeked her blog. It is a lot more than tweeking. It is hours and hours and hours of work. She has created a wonderful resource for weavers as well as for knitters and spinners.

Guidelines to our Small Scarf Virtual Exhibition -- Unravelling
Networked Broken Twill -- Weaverly
Twill Sampler -- Dot's Fibre to Fabric
Converting 14-Shaft Draft to 8 -- Unravelling
Inspired by Bonnie -- Weaving Spirit
One Morning -- Funny Farm
Colours Today -- Weaving Finlander

TAPESTRY

This next link is not from a weaving blog but from a textile blog. But it is about weaving, this time tapestry. It is well worth looking at, even if you have no intentions of ever weaving tapestry.

The Making of a Tapestry -- Ulrike Leander -- Textile Arts Resource Guide (yes this is a blog............)

COPYING

And this link has nothing, on the surface, to do with textiles, but is about art. The subject, however is very important for weavers as well as for artists in general: copying.

I suggest you read both Genn's essay and the comments. The last comment focuses on digital art. The art world tends not to accept digital art as art. I guess weavers aren't the only artists who have trouble being recognized by the art world.

Original Art -- The Painter's Keys

Friday, April 18, 2008

WINDING CONES

I groaned a bit when I realized that the skeins were going to be too small to fit on my Goko skeiner. That meant I was going to have to use my LeClerc skein winder.

Expecting the worst, I set the skein winder up. I made the arms small enough so that the skein would fit on it. Then I stretched out the arms as far as they would go and tightened the thing.

I did not want to use this skein winder as an unskeiner because it does not move around nearly as easily as the Goko. I was worried.

I wound the first skein off to a cone. Much to my surprise, it did not go badly. The first few minutes were filled with stopping to untangle twists. But once those initial spots were over, winding went not nearly as badly as I feared.

The first cone had only 100 yards. I did a couple more small skeins. Then I did a larger one. That was a bit more troublesome, but it really went quite well.

When I was investigating organzine, one of the things that I learned is that organzine is very strong. Thus it is recommended for warp. That is probably why the LeClerc skein winder worked alright as an unskeiner. It could tolerate the tension that the skein winder created every time it tightened up to unsnag a twisted yarn. Yes, most of the time I did not have to stop to untangle. The tension on the yarn, especially if I was turning the skein winder fairly quickly, was enough to snap it out of the tangle.

To tell the truth, however, I have not yet done that badly snarled skein of yarn.........

Related Post:

Skeins to Cones

Skeining Photos

Thursday, April 17, 2008

STASH GUILT

Deep End of the Loom and Dorothy have both helped me in my attempts to rid myself of stash guilt.

Deep End commented that her mother has a large stash of fabric. This way, "...when she wants to create she has what she love[s] on hand...

"So I think you could weave [for] the shear pleasure of the process, [for] your enjoyment and relaxation. If you find one pattern that you love you may already have the yardage you need to make it. It can only be win/win
."

I love win/win situations!

One caveat to Deep End's comment however: I do NOT weave for relaxation! Weaving is engaging, exciting, frustrating, demanding, thrilling, boring, horrible, wonderful, tedious, delightful, surprising, exhilarating, dreadful and always, always challenging..........but weaving is NOT relaxing!

More adjectives anyone?

To relax I either knit or spin. Especially spin. Very calming.

Dorothy commented that "...you need to know how a fabric feels and behaves before you can know what sort of pattern it is suited to. I think the worst thing you could do is feel you have to make the fabric up and to use a pattern you aren't entirely happy with - handwoven is far to precious for that."

Dorothy has not been weaving for very long, but she has developed wisdom quickly!

Wednesday, April 16, 2008

SKEINS DYED


Here are two of the sixteen skeins I dyed. Don't they look hysterical?! Compare these with some sample skeins I dyed earlier:


These sample skeins are smooth. The skeins at the top which are for weft are quite flyaway. The yarns just seem to have a life of their own. This was true of the skeins in their undyed state as well. when I took them off the skein winder, they just went beserk. But the skeins are now even worse since they are dyed.

Here is a detail of the top two skeins:


Not only is the flyaway character of this yarn evident, but an awful messy tangle is very clear in the teal skein on the right. I have NO idea whether ot not I will be able to wind this off onto a cone.

BOMBYX SILK VERSUS SILK ORGANZINE

Both sets of skeins are silk. Both sets of skeins are fine silk. But, they are different kinds of silk. The sample skeins which lie so nice and smoothly are bombyx silk. The dreadfully messy skeins are made of tassar silk organzine.

Also, the organzine has twice has much yardage as the bombyx silk. And it feels a bit crisper than the bombyx. Yet they appear to the naked eye to be the same size. Go here to see my discussion of the size issue.

DEFINITION OF ORGANZINE

But what is organzine? I didn't find much that was very helpful online. This definition I found to be most helpful: "raw silk yarns comprised of two or more twisted singles, which are then doubled and given a tight twist in the other direction."

APPARENT OVERTWISTING

Based on the say my organzine is acting, I would guess that it is the tight twist that is causing the misbehavior. I do not know whether the singles are spun or drawn from the silk worm's cocoon. In any case, it would seem that there is quite a bit more twist in the plying then in the spinning of the singles. That is what could account for all of this.

WINDING ORGANZINE ONTO CONES

How will it impact my winding cones and bobbins? We shall see.

WEAVING WITH ORGANZINE

I suspect I will have to keep the humidity in the house up when I weave. This is generally a good practice when working with silk anyway.

Tuesday, April 15, 2008

WEAVING YARDAGE AND GUILT

DARYL LANCASTER ON WEAVECAST

Last week I listened to an episode of Weavecast on sewing handwovens. The episode is number 26: Sew Your Weaving. It focussed on a wonderful interview with Daryl Lancaster. The interview was so inspiring that I recommend it to any weaver who has even had a glimmer of a notion of weaving yardage for clothing.

I have the yardage I have woven more or less recently.

A JACKET FOR THE YARDAGE

When I started on that project, I did know that I wanted to use it for a jacket., And I still want to use it for a jacket. I have not, however, felt compelled (inspired?) to do anything about it. I have looked at my jacket patterns. I have looked at other jacket patterns at the fabric store and also online. But everything leaves me flat.

CREATING A YARDAGE STASH

When Daryl weaves her yardage, she frequently has no particular plans for it. When she is done she treats her finished yardage simply as yardage she might have purchased in a store because she liked the fabric, not because she had any immediate plans for it. And it goes into her stash. For one, two, three years.

I have never had a fabric stash. Not in all my years of sewing. Creating a fabric stash was simply not economical.

Daryl, however, has clearly accumulated a stash of handwoven yardage. But she does not simply leave it stored away. She watches for patterns. Ultimately one strikes her fancy that will be perfect for one of her pieces in her stash. And she is off and running.

SPINNING A STASH

I do something similar with spinning. I spin yarn because something about the fiber calls to me. I may think I want to weave with it or knit with it. But really, I don't know. I just enjoy the process. And I collect a stash. I occasionally look through the stash to see if I want to do something with any of it. Often I do not, but once in awhile, ah, yes. And I am off and running.

WEAVING (AND SPINNING) FOR PLEASURE

My spun yarn stash creates no guilt. Why should a (small) fabric stash create guilt?

Is it wrong to weave solely for the pure pleasure of it?

I think I will pack my fabric carefully away (but not too far away---Daryl uses banker boxes). And let the guilt go. And wait. Who knows, perhaps I will weave some more yardage in the meantime!

Listening to Daryl Lancaster on WeaveCast relieved me of guilt. At last.

Monday, April 14, 2008

POSTSCRIPT TO THREADING HALF DONE

MARKING THE THREADING DRAFT

If you click on the picture in my previous post, you will see clearly how I mark my threading draft as I thread.

CHECK MARKS -- THREADING FINISHED

In the top threading is visible a slash, which indicates the midpoint of the threading draft. To the immediate right is a check mark. The check mark indicates the end of a threaded group. The threads in that group are tied together in a slip knot.

DOTS -- HEDDLES READY TO BE THREADED

Looking at the bottom group you can see two more of these check marks. But to the left of them you can also see a round dot. The round dot indicates that I have pulled out the heddles to be threaded from the last check mark (the one to the right of the dot) to the dot. When those heddles are correctly threaded and the yarns tied in a slip knot, I will replace the dot with a check mark.

THREADING HALF DONE

Well, actually, slightly over halfway done. But only slightly.


THE THREADING PRINTOUT

At the top of the loom you can see the narrow cork boards I mentioned on another post. I have attached the printed-out threading to it. The threading goes for two pages. But I arrange the page so that no more that two rows are visible at a time. I prefer having only one row visible. Then my eye isn't likely to wander to the wrong row.

NEED FOR FREQUENT BREAKS

I have discovered, sadly, that if I try to sit long enough to thread two different blocks, I am likely to make errors when I work on the second block. It seems it is difficult for my head to let go of the first sequence of heddles I had been threading. I either want to repeat that first sequence, or else, I want to thread some kind of compromise sequence.

I always seem to catch myself when I make this kind of error. But I certainly know I will definitely not try to thread a third block, with yet a difference sequence of heddles, without taking a break.

DYEING AND THREADING

It is not hard to spread out periods of threading. I still have plenty of dye work and yarn preparation to do and it is easy to fit threading times in between those activities. If all works out right, I shall be ready to weave at roughly the same time as the dyeing and yarn preparations are all finished.

Friday, April 11, 2008

INTERESTING POSTS FROM OTHER WEAVING BLOGS

Here are links to some of the weaving blog posts I have especially enjoyed this past week:

Breaks -- Weaverly
The Embodiment of Weaving Spirit -- Weaving Spirit
Compliments -- Unravelling
The Studio-To-Be -- Sandra's Loom Blog
Weaving with Bamboo -- Shirley Treasure
Hand Manipulated Weavin -- Deep End of the Loom

DYEING IN THE KITCHEN

Janice asked the following question about my dyeing:

"Where do you do this dyeing? I ask because I've been afraid to do it in the kitchen, but don't have another good place. Is it OK if you keep all the utensils for dyeing separate from those for cooking, or is there a danger of fumes and spatters getting on food and eating utensils?"

I am glad that Janice is so concerned about dye safety. Being concerned is very important. There are people who absolutely will not dye in their kitchen. At all.

NO DYE POWDERS IN THE KITCHEN

What I absolutely will not do is bring dye powders into the kitchen. I will not even open a jar of dye powder in the kitchen. Dye powders are extraordinarily light and can move easily into the air just in response to your breathing. Of course you would be using a face mask...........

Dye powders are the primary danger source. So I use my garage to mix up the dye stock solutions. I try to do this on a windless day so that I can keep the garage door open for added ventilation. I close that dye jar as soon as I can after I have opened it and wipe down the area with a damp cloth. Doing that always reveals unseen spilled powder.

STOCK SOLUTIONS

One reason I like using acid dyes so much is that I can make up dye stock solutions in one- and two-liter containers. They will store for a year or two, perhaps even longer. I do date the containers. Then I can use those stock solutions in the kitchen to mix the colors I want.

KEEPING THE KITCHEN SAFE

In the kitchen, I move all items related to cooking to another area. For me, all this usually means is moving the mixer and the coffee maker. I also remove the dishcloth from the sink.

I cover the area with oil cloth and sometimes I put newsprint down over that. Newsprint absorbs spills; oil cloth does not. Any spill, even a small spot left by putting down a stirring spoon, I immediately wipe up with a paper towel. The paper towels go into a closed trash can, as does the newsprint, if I have used it.

At the end of the session, I carefully wipe down the whole area. And the whole time I am dyeing I keep glancing at the floor just to make sure a drop or two of dye hasn't gotten on it.

FUMES

As for the fumes, yes, although I cannot smell them, I know that there are some fumes from the citric acid I use. These fumes are nothing like the fumes I would get, however, were I to use vinegar. Fortunately Sabraset dyes require very little acid, so any fumes do not concern me.

When I dye on the stove, I do turn on my professional kitchen hood to ventilate any fumes (and moisture) to the outside.

I will not do discharging, because the chemicals which are used for that have horrible and dangerous fumes. I won't even do that outside.

MY CONCLUSIONS

I do not dye often or for long periods. If I dyed every day I would carefully investigate the need for a respirator. I suspect that I would find I would not need one. But I do not know.

From the literature I have read, it is the dye powder which is the potential hazard. Keeping this in mind, we need to remember that spilled dye liquid, when dry, will turn into dye powder. That is why I am so meticulous about cleaning up the slightest spills.

Thursday, April 10, 2008

CRACKLE AND PAINTED WARPS

Dyeing the weft yarns for this upcoming crackle warp has brought warp painting back to mind.

PAINTING A TENCEL WARP

What popped up was a painted warp scarf I had done years ago. The yarn was tencel. The structure was plain weave. Using MX Procion dyes, I painted the warp yarns in swathes of bright yellowed orange and bright yellow. Then I painted skeins for weft with the leftover dye solutions. I let the warps and skeins cure for a couple of days, then steamed them, let them dry, and got to work.

WEAVING THE SCARF

When I wove it off, I used yellows in the yellow section and oranges in the orange sections. But because the warps were not painted rigidly but very loosely, the yellows and oranges flowed into each other. Thus there were times when yellow wefts crossed orange warps and orange wefts crossed yellow warps.

The scarf turned out to be an absolute favorite of mine. I hung it in my studio (I had a studio back then). Looking at it lightened my heart and brought a smile to my face. It was a joyful, happy scarf. And my heart leaped a bit whenever I glanced at it.

PAINTING A CRACKLE WARP?

Couldn't I just do something simple like that with crackle? Two colors. Paint the warp in swathes of the two colors. Nothing rigid. Paint the wefts with the leftover dye solutions. Steam and dry the yarns. Warp the loom. And weave.

THE RESULT?

I envision a scarf where blocks appear and disappear. Or at least a scarf where blocks lose and gain prominence. I think it might be interesting.

Related Post: Leaving the Comfort Zone

RED WEFTS DYED


I had been planning on using my big pots to dye the weft skeins. At most, I planned that I could handle two at a time. But then I weighed the skeins.

The skeins weighed 10 grams each. Actually, they weighed 9.5 grams, but I decided to round up to 10 for easier calculating.

When you dye anything, you have to calculated the total amount of dye liquor (water + dye solution + additives) needed. The minimum amount is 30 times the weight of the fiber. 30 times 10 is 300. 300 grams, you say? That is dry weight. But since each gram is the liquid equivalent of one millileter (ml), that translates to 300 ml of liquid total.

In case you are choking on the metric system, 300 ml is a tiny bit more than 1 cup.

The wonderful and practical result of this is that I could make much more efficient use of my time. Instead of a large pot with one skein in it, I could use my electric frying pan (cheap, dedicated to dyeing) for a water bath in which to place the five canning jars I would need, one for each skein. And that is what you are looking at in the picture.

The long thing sticking out of one of the jars is a thermometer. It has a metal shield on it to protect it from breaking.

My assumption, in using only one thermometer, is that all the jars in the pan heat up to about the same temperature. And I need the thermometer because I have to control the speed with which the temperature rises, and I can let that temperature, with silk, get no higher than 200 degrees fahrenheit.

When I finished, I let the skeins sit in the jars overnight to soak up any more dye it might soak up. Then I rinsed them and they are now hanging to dry.

Tomorrow, on to the blues.

Related Posts:
Dye Stock Solutions
Anger Despite Playing with Dyes

Wednesday, April 9, 2008

THE THREADING PROCESS


BLOCKS, UNITS, THREADS

Crackle is a block structure. Each block contains one or more units and each unit has four threads. In this case, each of my blocks consists of eight units.

SLIDING THE HEDDLES

I thread four units at a time. That means 16 heddles. Since this is crackle, only three shafts are involved in any given group. What I then do is to slide the number of heddles I need for that group on each shaft to my right. I slip the bout of threads I am going to use between those heddles and the heddles on my left. Doing this keeps the selected heddles from slipping back into the larger group.

Looking at the photo, you can see in the darkness to the far right the heddles that are already threaded and checked. Then in the light are the 16 heddles waiting to be threaded. Snugged up, almost invisble, against the center heddles waiting their turn is the bout of yarn from which I will draw out the individual ends for threading.

THREADING THE HEDDLES

Since there are four threads in a unit, I remove the first four threads and separate them between my the fingers of my left hand in the order of threading. I slip my threading hook into the first heddle to be threaded, use the hook to grab the first thread in my left hand and pull it through. I do the same thing with the remaining three threads. Then I move on to the next four threads.

With less fine threads and with wools and cottons I can usually just tighten the whole bout with my left hand and then use my threading hook to grab the yarn as it sits on the lease sticks. But this fine silk is not so easily tamed.

CHECKING THE THREADING

I thread all 16 heddles. Then I check the threading by pulling tightly on the threaded ends with my left hand and with my right hand, touching each heddle and thead. In my early days of weaving I used to do a lot of eyeballing here. As long as the setts were not very close and the yarns were fairly heavy, I could get away with that. But as I started working with silk and with finer threads I found out I couldn't just eyeball. I actually had to go there with my hands so I could really see that the threads were going through the right heddles.

SLIP KNOTS

When I am satisfied that the threading is correct, I tie those 16 ends in a slip knot. Then I do the next 16 ends. When I am satisfied that those are correctly threaded, I pull the slip knot out of the first half of the block of yarns and tie the entire group together in a slip knot.

THE PRINTED THREADING

To make threading a little easier, I have attached two long skinny pieces of corkboard at the top of my castle (not visible in this photo). I pin my threading to it, and mark off the groups of threads as I proceed.

This process makes it easy to thread in spare bits of time. I have the printed threading I can check. But I can also count the blocks I have threaded by looking at the slip knots.

Actually, it is much easier for me to thread in spare moments than to sit at the loom for hours just threading.

Related Posts:
Let the Threading Begin
Threading 4-Shaft Crackle

Tuesday, April 8, 2008

LET THE THREADING BEGIN

MOVING THE HEDDLES

The heddles that I am going to need to right of center have been moved from the sides to the center, as the picture shows. But why do I need to do this at all?

If you look at the center of my shafts, you see a knobby thing sticking down from the top of the first shaft. This knobby thing is on each shaft.. It is on the bottom of each shaft as well. These keep heddles from crossing to the center. So, to make life bearable, I move the necessary shafts from the right side to the left.

How do I know how many to move? Before I purchased weaving software, I took my written draft. I found the center. Then I counted the heddles on each shaft that were to the right of center.

My weaving software, however, computes the total number of heddles on each shaft that I will need. I divide each of those in half to figure out how many I need to push to the center on each shaft. If I have an odd, assymetric threading, this doesn't work so well. But this time my threading is quite symmetric.

TOO MANY? TOO FEW?

Despite weaving software, despite careful counting, I don't usually end up quite right when I get to the center. Either I have two or three heddles too many, or I am missing two or three heddles. Those center bars can be raised so that I can move the heddles across center. Not my favorite activity, but it can be done.

Also, if I have too many heddles, I can just leave them where they are. But somehow that disturbs my sense of .........aesthetics? I just don't like it. Partly, also, I am usually weaving at quite fine setts so I don't think it would be helpful to the weaving to have any extra heddles hanging around. So I always get them where they are supposed to be.

THREADING LEFT TO RIGHT AND RIGHT TO LEFT

There is another alternative to approaching threading. Leave all the heddles at the side. Then thread the heddles on the right from right to left instead of left to right.

I have done this. And it does work. But, for me, anyway, doing it this way is a bit problematic.

First, it is a bit awkward. Practice would probably get rid of this awkwardness.

But what really bothers me is the greater opportunity for threading errors changing threading directions creates. Changing reading a draft from left to right (as you would threading the right side) to reading it from right to left (as you would for threading the left side) can create havoc with short-term memory.

For example, you've just gotten used to threading 1,2,3,4,1,2,3,4.................. And then suddenly you have to reverse yourself and start threading 4,3,2,1,4,3,2,1.............. How easy it is to forget,when you are threading the left side, not to reverse yourself. And if the numbers go kind of crazy (1,2,3,2,1,2,3,4,3,2,3,42,3,4,5,4..........), well, you've got a recipe for disaster!

And here is the actual threading:


Related Posts:
Next Crackle Project (Corrected)
8 Crackle Blocks on 4 Shafts Sampling

Monday, April 7, 2008

RECENT COMMENTS AND QUESTIONS

Meg in Nelson had this request:

"Oh, do please confirm that it happens with wool also. This is almost a every-warp occurrence for me, and I had thought I was the only one who managed to somehow have something like this happen!!"

Leigh left this comment:

"Interesting that this is more common than one would think! It only first happened to me since I started weaving on my Glimakra. I thought I had done something really dunce headed. It's happened more than once; with cotton warp. So there's a comfort in knowing it isn't that uncommon and that there is a logical way to deal with it."

What I thought invaluable about these two comments was their having learned that they are not alone! Weavers can be so isolated. The danger of isolation is diminishing lack of perspective. That is not good.

And I as well learned that silk is not the only culprit here!

I thank Meg and Leigh for their comments.

A QUESTION ON WEIGHTS

And Isabelle asked what I use for warp weights. Here is a picture of one of them.


These are two I-don't-know-what-they-are-called that I use for weights. The one to the right is heavier than the lower one. I have hooked them together because I need all that weight on one bout of silk.

I used six of these grouped weights on my warp, one for each bout. The result is that the silk bouts, as I wind them onto the back beam, are actually at higher tension than they will be when I weave the warp off.

You can get them at any builder's supply. Take the picture in and ask a clerk. Or just wander around Lowe's or Home Depot (one of my favorite pastimes!)

BOUTS

Meg, by the way, caught the double-entendre in the word bout: the word is used in the world of fighting as well. No further comment..............(grin!)

INTERESTING POSTS FROM OTHER WEAVING BLOGS

Some recent posts on other weaving blogs I have expecially enjoyed.

Virtually - In the Studio - Weaving Spirit
MTW With Heavier Weft - Leigh's Fiber Journal
Warping an Ashford Rigid Heddle - Deep End of the Loom
Just Right Handweave Purses - Curious Weaver
Post Partum - The Linnet Knits (a knitting blogger who is getting into weaving)
Business Paraphernalia - Constance Rose Textile Designs
Win Currie, Weaver - Unravelling

The last post is from a fabric artist's blog. But as a weaver, I found the post very interesting.

"I Love Your Work" - Studio 78 Notes

Friday, April 4, 2008

QUESTION ON UNTWISTING WARP BOUTS: A BIT MORE

I think one thing that may have confused Janice is that possibly she thought that the twist involved individual warp ends. If you look carefully at the photograph, you can see that it involves the whole bout, not just some individual ends.

Consequently, to untwist, all you have to do is to take the whole bout in your hands and turn it in the direction that will remove the twist.

QUESTION ON UNTWISTING WARP BOUTS

Janice raised the following question about untwisting twisted warps when I am in the process of beaming:

"In that part where you say you've found another twist, you say you untwist it--how do you do that at that point without making a mess of the warp?"

WEIGHTS STILL ON THE WARP

First let me note that the weights are still on, so the warps are under very strong tension, probably stronger tension than they will be on when I am actually weaving.

UNTWISTING PROCESS

I go to the spot where I see the twist. I analyze which way I need to turn the bout to untwist it. I lift it up as a group with my hands. I then rotate the bout in the right direction and lay it back down.

In the previous post, if you click on the picture of the twisted bout you can see it greatly magnified. Then you can clearly see it that it is spiraling/twisting to the right. To straighten it out, you only have to insert your right hand under it and flip the bout over to the left.

CHECKING AT FRONT OF LOOM

After doing this, I go to the front of the loom and examine that particular bout to see if the untwisting continues. If it does, I repeat the above exercise.

I try to be vigilant about this examination. If I catch the twisting as soon as I see it, it will mean rotating the warp only one turn. That was the case in the warp in the picture.

THE YARN, NOT THE WEAVER

An important thing to remember is that even if you start out beaming with the warp in lovely flat ribbons, if it's silk, those bouts at some point are probably going to start twisting. It's not your beaming technique that is your fault. It is silk's propensity to do this.

Related Post: Winding on the Warp

Thursday, April 3, 2008

WINDING ON THE WARP


I'm almost ready to start winding the warp onto the back beam. I have yet to hang the weights off the front of the loom. These will tension the warp so that I can move the lease sticks up the warp to clear all the threads.

MOVING UP THE LEASE STICKS


I move the lease sticks individually. I have moved the first one up. This one will stay up there until I start winding the warp. The second one I will move up also, but it will slide back down to the raddle. That doesn't matter. The warp will flow nicely through the stick.

Note the excellent view of my very amateurish nail pounding........

BACK ROD


The rod is now safely on the back beam. It is running parallel to the warp beam. That is critical. If it does not run parallel, the warp will go on crooked and as you weave, the warp tension will get increasingly uneven.

PUTTING ON THE WARPING STICKS


And now it is time to put on the warping sticks. The LeClerc back beam is not round; it is octagonal. I put on eight sticks. Then I wind two to three layers and put on another eight sticks. I continue this way until the warp is wound.

Because the warp is bombyx silk, fine, and very slippery, I insert the warp sticks frequently. I don't want any slippage.


TWISTS YET AGAIN


Remember twists? I'm not done with watching for them. The bout on the right shows what they should look like as I wind them on to the beam: a ribbon of yarn.

The bout to its immediate left shows what they should not be: a round twisted group of yarns. And the bout on the left is not so great either. So I straighten them out before I even try pushing the lease sticks up in preparation for more winding on.


WARP IS WOUND ON

Below, the last of the warp has been wound on. I have removed the front beam, the cloth beam, and the top half of the beater. I have moved the lease sticks up close to the heddles and attached them to the side pieces of the loom. And I have put books under the shafts to lift them up to a comfortable threading height.


KNOTS YET AGAIN

All in all, the warp wound on nicely with little trouble. Only one small problem: a knot appeared out of nowhere on one of the warp ends. Of course it wanted to glue itself to neighboring warp ends. And I will have to watch for that little devil when I start to weave so that I can cut it out right at the back beam and treat it as a broken end. If I don't do that, its attaching to neighbors will likely raise havoc with my sheds. Another reason to get rid of knots while making the warp to begin with!

Related Post:

Even Warp Tensioning
Here are the Warp Bouts

Wednesday, April 2, 2008

TWIST AT LEASE STICKS


Here is a picture of one of the bouts that actually got twisted at the lease sticks. I had not seen this until I started the process of raddling. The bout that is twisted is on the right. I removed one of the lease sticks, untwisted the bout and slipped the lease stick back in.

The lease stick I removed was the lower one.

THE COUNTING THREAD TIE

The yellow counting thread is the counting thread I tied loosely on the bout as I was making the warp. I tied a bow knot in it before I removed it. This knot tells me which way the bouts go on the lease sticks and rod.

BOW KNOTS FACE ONE DIRECTION

In this case, I decided to have them all the knots face towards the right. To keep this particular one facing right, I had to remove the lower lease stick and straighten the twist there.

Doing this is probably what caused the bout to be then twisted on the rod.

On this particular warp I had no concern with what way the knots faced. I had no concern with the order of the warps. It is a solid color warp. Had I used stripes and the stripes were in a particular order, the knots would be important.

WHY BOTHER?

So, then, why did I bother with the knots? Habit. If I do this with every warp, I will probably not forget to do it when it is important.

WARP IS RADDLED


The raddling is done.

PROBLEMS

Yes, I did have problems. Twice I discovered that the warp ends twisted as they went from the rod through the lease sticks. This is easy to spot. When I select the first threads from a bout to drop into the raddle, they refuse to separate from the rest of the bout.

I used to yank at them to force them to separate. Doing that does not help. Why not?

STRAIGHTENING A WARP BOUT

Looking at the rod shows that they are coming from the wrong side of the bout. Since I raddle from right to left, I am separating the threads out at the right side of the bout. If those initial eight threads are at the right side, but on the rod are on the left side, I have twisted the bout as I led it from rod to lease sticks.

So I remove the rod (carefully), untwist the warp and slip the rod back in.

Unfortunately, doing this usually means removing neighboring bouts from the rod as well, so that I can get at the offending bout. Doing this requires even greater care. I must make sure all the loops get back on. And I must make sure that those neighboring bouts are not twisted when I put them back on the rod.

NEXT: BEAMING ON

Note that the warp yarns are now thrown over the castle. I am almost ready to start beaming on.

Related Post:
I Ought Not to be a Weaver
Preparing the Warp Bouts for the Loom

Tuesday, April 1, 2008

READY TO RADDLE

The lease sticks are set up, the raddle is in place on the back beam, and


the raddle weights are attached to the warp bouts at the front.

The weights are red chip clips and are just barely visible under the front beam. These clips keep the warp under just enough tension to make it easy to separate the threads at the back of the loom and drop them into the raddle.

Some people just wind the bouts once or twice around the front beam. But silk is slippery. I find the clips much more effective.


This is when I get really nervous. What I am preparing to do has nothing to do with design, creativity, play, imagination, fun, let's try this............ This is about technique pure and simple. This is about getting a good warp on. A good warp is one that weaves off easily with no problems. And raddling is an important step.

And with a 60/2 silk warp, in a dark color, to be sett at 72 epi.......misgivings are welling up into my consciousness right and left! Already I have had problems just getting the warps on the rod and lease sticks correctly. At each step I stretch the warp out to give me a good view of any twists that might have developed.

I am just a bit nervous.

Related Post: Ready to Raddle: Some Problems

INTERESTING POSTS FRM OTHER WEAVING BLOGS

Here are some of the posts from the past week that I found particularly interesting:

Choosing Heddles and Threading the Loom
-- Linda's Weblog
Teeny Handwovens -- Curious Weaver
Cutting Off Day, and other Violent Matters -- Weaverly
Documentation -- T'Katch
More M's and O's -- Charleen's Fiberblog
Colored Heddles -- Knitting in August