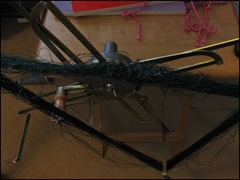
Bolstered by fairly easy cone winding so far, I decided to set my mind to that badly snarled skein of yarn I showed on an earlier post.
The picture here shows what that skein looked like when I finally got it onto the skein winder. But in case you want to see the picture of the skein itself again, just click on the Skeins Dyed hyperlink at the end of this post.
THE LEARNING BEGINS
The first thing I learned is that the skein would not fit on my LeClerc skein winder.
The next thing I learned is that I didn't have to wind it over all four arms. Three arms did just fine, thank you. So now I had a triangle instead of a rectangle.
I fussed around a bit. My fussing only convinced me that this was going to be impossible. Here is a close-up of what I faced:
I fussed around some more and removed the two figure-of-8 ties.
A LONG LOOSE END
Then I saw it. A long loose end hanging down to the floor. Oh dear. Where did that come from? I had no idea.
Instead of starting from the actual end or beginning of the skein, I decided to start with this loose end. This loose end that came from somewhere it the middle of the skein. I had no idea where.
Trying to unwind from that loose end was awful. I had to keep threading it in an out of messed up ends. Finally I had about a yard pulled out of the mess. I wound that onto the cone.
CROCHET HOOK TO THE RESCUE
I got out my trusty crochet hook and did some more playing with that snarled-up mess. I could hardly believe that that unwinding seemed to be improving. Slightly. Each time something improved, I could open the arms on the skein winder a tiny bit more. Then I cut the end I had wound onto the cone, and threaded the other end in and out of various ends on the winder.
Until I began to realize that I didn't have to do this any more.
WINDING GETS EASIER
I learned that when I hit a snarl, if I messed a bit with the snarl, I could continue unwinding without threading the yarn through stuff. The snarling yarns just seemed to slip away from the unwinding yarn.
Having figured this out, I knotted the end to the end coming from the cone and wound on what I had unwound from the skein. Then I turned the skein winder with my left hand and at the same time used my right hand to turn the cone winder. Whenever I had a problem, I fussed with the other ends, and then continued winding. Slow, but it seemed to work.
ANOTHER LOOSE END
Then i saw another loose end.......... Oh dear heaven above, what now? I assumed it was probably the other end of the loose end that i was working with.
A HAPPY ENDING
To shorten a long, tedious story, the cone did get wound satisfactorily. Only two more times did I have to cut and retie. And it really take all that long.
I was pleased. After all, I had originally thought the skein was going to be a total loss!
Related Links:


No comments:
Post a Comment