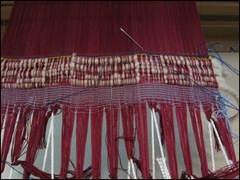
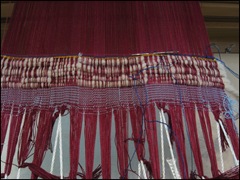
I have chosen to finish the edges of this scarf with hemstitching and to cut the fringes fairly short. I could make long fringes and finish those with some kind of braiding. I enjoy doing that. But with silk this fine, and with the interest being focused on the scarf itself, I think short fringes with the edges hemstitched is best.
Because I planned to hemstitch, I left extra warp on the right when I threw my first shot of weft. The amount I left was approximately 4-5 times the width of the fabric. This is the end I put in the needle to do the hemstitching.
HEMSTITCHING DIRECTIONS
For hemstitching I use the directions in Virginia M. West's, Finishing Touches for the Handweaver, revised edition. On page 16, she has a clear diagram on how to do it at the beginning of the weaving and a second clear diagram for the end of the weaving. Until I found this, I felt like I was trying to twist my head around 180 degrees to figure out how to mirror the hemstitching at the other end!
STEP ONE
Here in the first picture you step step one of the hemstitching. The needle goes down into the chosen space at the bottom edge of the fabric. Then the needle comes up to the left, still on the bottom edge of the fabric.
STEP TWO
Here is step two. The needle goes back to the first space it went in at the right. But  when it emerges at the left, it comes up about six weft yarns into the fabric. In this case, that means to the top of the woven section. I had thrown six weft shots because that was how deep I wanted the hemstitching to be.
You continue by returning to step one, inserting the needle into the bottom edge of the fabric where it had emerged in the first part of step one.
The Weaver's Companion also has good directions and diagrams. Here, however, the hemstitching is done from left to right instead of right to left. It doesn't matter which direction you go, just as long as you are consistent.
SIZE OF HEMSTITCHED GROUPS
I am grouping 12 ends in a unit. This is three dents worth of threads. It is easy to run my needle between the groups up at the reed and then use my finger to run the division down to where I am hemstitching. This is easier than counting out 12 individual warp ends.
TAMING SILK ORGANZINE WITH "THREAD HEAVEN"
I quickly learned that this silk organzine did not want to behave as a sewing/embroidery thread. So I have lubricated it heavily with "Thread Heaven," now available at most chain fabric stores such as Hancock's or JoAnn's. It is what sewers now use instead of beeswax. It does a good job and doesn't have those little bits and pieces tof wax that would come off beeswaxed threads. This organzine has become very sleek and docile.


No comments:
Post a Comment