Tuesday, September 30, 2008

CHANGING MY MIND AT THE WARPING BOARD

Posted by Peg in South Carolina

I said this in a recent post, as I was preparing for making the warp: “The warp will consist of the white cotton, separated approximately every 3.5 inches by 2 ends of ?”

So, my plan for the warp consisted of 70 bouts.

  • Bout 1: 4 ends of brown + 92 ends of white
  • Bouts 2-6: 2 ends of brown + 90 ends of white
  • Bout 7: 2 ends of brown + 92 ends of white + 4 ends of brown

You might have noticed that I have decided on brown for the narrow warp stripes.

You might also have noticed the greater number of ends in the bouts that go on each end. I have anticipated more draw-in at the selvedges than throughout the warp and so have added more warp ends there in the hope of having all the blocks and stripes the same width.

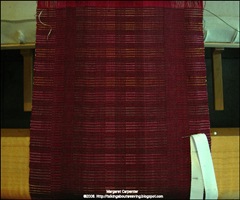
As I was making the first bout, I decided that at 24 epi, 2 ends of brown Completed bout on warping board is not enough. So I’m changing to 4 ends, but with 8 ends of brown on each end. I am still compensating for selvedge draw-in in these calculations.
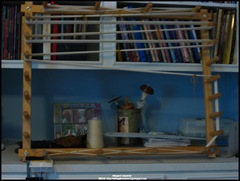
The completed first bout is shown on the warping board here. I had made this as bout 1 for the original plan. I have now simply relabeled it as bout 1.

I could have used 6 ends of brown on the sides. Actually I would have preferred 6 warp ends. With the floating selvedge that would give me 7 warp ends on each side which I think would be just perfect. But I didn’t want to.

Why not?

I am warping with a paddle, 2 ends at a time. That creates warp groups of 4 ends. The number of ends in a raddle opening will be 12. That means that I need to have the number of ends in a bout divisible by 4 or else I will end up splitting groups in the raddle.

I have read a number of times recently how bad it is to split groups of warp ends in the raddle. That is, it is apparently not good to put two ends of one group into one raddle opening and another two in the next raddle opening. It would seem that somehow as you move the warp forward during the weaving, the warp ends can get crossed up.

Frankly, I don’t see quite how this happens. I’ve tried to picture it in my head, but I am not a good imaginer. I have split groups in the last few silk warps I have made and, believe me, at 72 epi I did that with fear and trembling each time. But each time everything went fine. Perhaps a reader here has a clue?

In any case, I am creating a warp this time where there will be no split groups in the raddle.


Related Post: Warping Work Station with Coffee

"Changing My Mind at the Warping Board" was written by Margaret Carpenter for Talking about Weaving and was originally posted on September 30, 2008. © 2008 Margaret Carpenter aka Peg in South Carolina
Monday, September 29, 2008

CHRISTMAS TOWEL DETAILS: WARP LENGTH

Posted by Peg in South Carolina

My first thought had been to weave three towels.  Three for my daughter.  That seemed like a nice round number.  But then I thought, I would really like one for myself just so I have something for myself from the warp.  And then niggling at me is a very good friend, for whom I would like to weave one for Christmas.  She had done a great deal for me when I was sick and has since remained a very good friend.  I might like to weave her one. 

So, the long and the short of it is that I  have decided to put on enough warp for five towels.  If I am really tired of the whole thing after four towels, I can just call it quits. Unmercerized cotton is inexpensive and the amount lost would represent very little financially, and barely anything in extra work.  So I think it worthwhile to put on that extra warp just in case I do find I want to weave this little gift.

"Christmas towel Details: Warp Length" was written by Margaret Carpenter for Talking about Weaving and was originally posted on September 29, 2008. © 2008 Margaret Carpenter aka Peg in South Carolina
Friday, September 26, 2008

DESIGNING THE CHRISTMAS TOWELS YET AGAIN

Posted by Peg in South Carolina

As I come slowly to the end of the silk crackle, I realize that the loom is about to be empty. Well, OK, at the rate I weave, it will probably still be a few more days before the loom is empty. At any rate, I really like to have a warp ready to go on the loom before I am finished with the current project. So I decided to get to work on our daughter’s Christmas towels.

My first plan, discussed here, way back in May, had been to do color-and-weave. A month later, I had changed my mind and decided to do simple twill. To read about this change in plans, go here. But by early July I was starting to think about crackle, as you can read here.

Crackle seemed to be the final choice. Certainly it seemed a logical choice considering my current obsession with crackle! So here and here, I considered yarn choices. I figured out the block design I wanted. Then I made the warp calculations here. I made the weft calculations here.

And now?

I’m back to simple 2/2 twill.

Why? Because, unlike crackle, the floats are limited to two. Because, while 2/2 twill creates a firm fabric, at the same time it creates a fabric supple enough for the dryer of dishes to get easily into the nooks and crannies of the dishes.

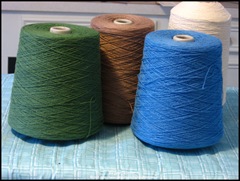
The design itself is a simple one--inspired by a photo on page 26 in Sharon Alderman’s Mastering Weave Structures. This fabric a wool check designed in browns and grays and is very elegant. The wool yarn, of course, is not suitable for towels, but neither are the colors. Instead, I The cones of yarnwill use 8/2 unmercerized cotton; and these towels will use the colors in the photo at the left. One color is missing—a yellow—and is on backorder.

The warp will consist of the white cotton, separated approximately every 3.5 inches by 2 ends of ? Well, I haven’t quite decided that yet. I’m thinking brown. The weft stripes could be the same brown or the blue or green or yellow. The weft 3.5 inch checks could be white, blue, green, or white. Or I could weave a solid weft in one of those colors. And because there will be so few warp ends involved in the striping (a total of 20), the idea of changing those colors in midstream is within the realm of possibility.

Each towel is going to be different.

A POST NOTE ON PHOTOGRAPHY

When I photographed the above cones close up, the cones on the left slanted to the left and those one the right slanted a great deal to the right. Talk about being drunk!

But when I stood farther back and used the camera to zoom, the distortion disappeared. Well, no. It didn’t completely disappear, but it certainly improved.

This has me very curious.

  1. Why does this happen?
  2. How can I correct it in the software?

Ideas are welcome!


Related Post: Authoritative Statements


"Designing the Christmas Towels Yet Again" was written by Margaret Carpenter for Talking about Weaving and was originally posted on September 25, 2008. © 2008 Margaret Carpenter aka Peg in South Carolina
Thursday, September 25, 2008

SCARCELY ONE ROUND OF WARP LEFT ON THE BACK BEAM

Posted by Peg in South Carolina

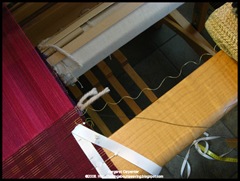
The end is coming


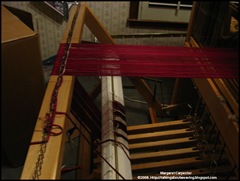
The funny extra loops you see around the back beam and going up to the raddle and looping around the raddle nails? That was a group of warp ends that I did not need when I warped the loom. I kept them there just in case…….


"Scarcely One Round of Warp Left on the Back Beam" was written by Margaret Carpenter for Talking about Weaving and was originally posted on September 25, 2008. © 2008 Margaret Carpenter aka Peg in South Carolina
Wednesday, September 24, 2008

WHERE IS MY FELL?

Posted by Peg in South Carolina

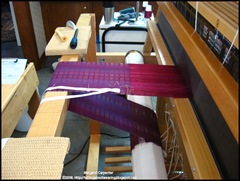
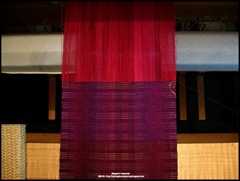
Here is a photo which shows where I am keeping the fell line during Location of fell weaving. It is probably closer to the reed than many weavers would normally weave. But in the case of this warp it is working fine.

WHY I WOVE CLOSE TO THE BREAST BEAM

I now remember why I was weaving with the fell as close to the front beam as possible. Because the angle formed by the warp ends is not so extreme there, opening the sheds is easier on the warp. The closer you get to the beater, the more strength is required of the warp when the shed is opened, especially if you weave on a highly tensioned warp as I do. Silk, however, especially if tightly spun, is incredibly strong and will take the tension.

MOVING THE FABRIC AS YOU WEAVE

Wherever you decide to keep the fell when weaving, it is important to move the fabric every inch or two. Doing this keeps the fell in the same position throughout the weaving. In an earlier post I had mentioned Osterkamp’s discussion of how the ability of the beater to pack in the weft grows stronger as the fell approaches the front beam. If you want a consistent beat, then, it is important to keep the fell in the same or nearly the same position all the time you weave.

A BEGINNING WEAVER’S FEAR

When I was a new weaver I wove each small section for as long as I possibly could. I wove with the fell starting as close to the front beam as possible and continued weaving until I simply could not get the shuttle through a decent shed. Why? Ignorance for one thing! Fear for the other!

I did know what would happen if I didn’t maintain the same tension throughout; I did know that the beat was likely to change. I didn’t understand why. But I had seen baby blankets woven where even from a distance it was clear the beat had changed from beginning to end. No measuring and counting was necessary in order to see this. So I was afraid that I would not be able to get the same tension back after I moved the warp. Consequently I thought the less I had to move the warp, the less danger there was for this. Logical, huh?!

Related Posts:
Practice
Learning the Hard Way


"Where is my Fell?" was written by Margaret Carpenter for Talking about Weaving and was originally posted on September 24, 2008. © 2008 Margaret Carpenter aka Peg in South Carolina
Tuesday, September 23, 2008

RECENT POSTS FROM OTHER BLOGS

Posted by Peg in South Carolina

Laura Fry has so many wonderful posts recently that I would have to post them all.  So, just go to her blog, Weaving a Life, and check them all out.

Crackle (Finally) and the Shawl -- Sleeping Dog Weaving
End-Feed Shuttles   
Weaving Magic – Stitch

A new idea for warp packing material

Another Home Run for Ikea -- Shirley Treasure

Collaboration -- The Weaving Diva
First Wood Scarf Finished and the "S" Word -- Sandra's Loom Blog
Color Possibilities with Shadow Weave -- Unravelling
16 Straight -- Weaverly
A Finished Fabric -- Renee Weaves!

The following two posts from Leigh’s Fiber Journal should be read together, as the first is a prelude to the second.
Good Ol' Plain Weave  
Plain Weave Shawl   

One Quarter -- Cyber Fiber Scriber
Colours and Thoughts on Looms -- Dot's Fiber to Fabric
Close Up Colour and Weave -- Dot's Fibre to Fabric
Weaving a Way to Wellness -- Weaving a Life (Salt Spring Weaving)
Actual Weaving -- Deep End of the Loom
What I Wove with the Silk I Dyed -- Hamblecampbell
Second Scarf is Inches Away from Being Done -- Centerweave
Pattern Drafting -- Weave4Fun
Look at Me Warping -- Taueret
Tell Me of This Sounds Crazy -- The String and I
E's Just a "Wittle" Loom -- Straight of the Goods
Sett -- Tien's Blog

The following post excellent, very detailed review of these looms, worth saving even if you think you might not ever use one, 'cuz you just never know......
Rigid Heddle Loom Review -- River City Weaves 

Purses and Change -- Curious Weaver
Best Laid Plans -- Kindred Threads
Tree Scarves -- Avalanche Looms
Guild Exchange -- The Open Shed
Geoff's Scarf -- Fibres of Being

COLOR INSPIRATION

A feast for the eyes;  lots of color inspiration here 
Van Gogh and the Colors of Night  Colour and Design Blog

FOOD FOR THOUGHT

I read this as a weaver, and it is so applicable.  Tip of the hat to Valerie for this
How to Live Life to the Max with Beginner's Mind -- Zen Habits

Related Post: Recent Posts from Other Blogs (April 25, 2008))

"Recent Posts from Other Blogs" was written by Margaret Carpenter for Talking about Weaving and was originally posted on September 23, 2008. © 2008 Margaret Carpenter aka Peg in South Carolina
Monday, September 22, 2008

SILK ORGANZINE YARN VERSUS BOMBYX SILK YARN

Posted by Peg in South Carolina

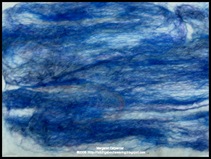
In the art pieces I wove off of the current warp, I used only silk organzine for weft yarn.  In the samples for the Crackle Exchange, however, I am using both bombyx silk (60/2) and silk organzine.  I am using the organzine for the pattern wefts, bombyx versus organzine silk yarn the bombyx silk for the background.  My idea was to create a greater contrast between the pattern color and the background.  But I am also curious as to what the drape of this cloth will be compared to the cloth where all the weft is organzine.

LIVELY WEFT YARN

While I was weaving, I noticed something that I had not observed before.  I saw that the yellow organzine as it came off the bobbin was lively, keeping the curved shape it had developed on the bobbin. See the kinky yellow weft yarn in the photo. The dark green bombyx (lying over the breast beam), however, was quite limp; it retained no memory from having been on the bobbin.

I suspect this liveliness of the organzine contributes to the little loops that want to pop up in the woven fabric. 

I have pretty much gotten control of this phenomenon.  But one thing I see now is that when I use the organzine in an actual shuttle (end feed)I will have to tighten the tension on that shuttle more than I have to with the bombyx silk.  Tightening the tension just a bit more will more strongly encourage the organzine to STAY FLAT!

Tightening the bobbin tension will doubtless have an effect on the selvedges, pulling the cloth in more.  I will either live with that or I will use temples to deal with that issue.

OSTERKAMP ON KINKY YARN

Having recently had occasion to look at Osterkamp’s Volume Three (something I hadn’t done for a long time), I decided to see if she had anything to say on this problem.  Well, yes indeed, she does have a great deal to say.  She writes for two pages about “kinky” yarns, two pages in small type and with many helpful drawings (pages 138-139).  She tells you how to test if the yarn is overtwisted, she discusses ways that the weaver might have inadvertently added twist to the yarn as she handled it, and she gives you ways to solve it.  And one of these ways is the way I had decided to try.  Here are her actual words:

You might use more tension than usual on kinky wefts, but don’t use so much that you cut in at the selvedges and the selvedge threads break.  You might need to us a temple to prevent the selvedge threads from breaking.

And then, of course, she refers to the page in this volume where she discusses temples.  I think this volume needs to be kept handy for awhile.

COLOR ACCURACY IN PHOTOS

Another observation:  the colors of the weaving in this photo are much better than in the photo of the earlier post.  Perhaps I need to play with the spot or spots the camera focuses on.

"Silk Organzine Yarn versus Bombyx Silk Yarn" was written by Margaret Carpenter for Talking about Weaving and was originally posted on September 22, 2008. © 2008 Margaret Carpenter aka Peg in South Carolina
Friday, September 19, 2008

LEARNING THE HARD WAY

Posted by Peg in South Carolina

I did it. Instead of weaving with the fell close to the front beam, I moved the fell a little more than half way towards the heddles. Problems gone. Oh, very slight softening of threads on one block on one treadle only. But when the bobbin touched the shuttle race at that point on that shed one time, those threads cleared quick as a wink. So I know that a shuttle passing across the shuttle race would do the. Also a swift flick of the fingernail across that part of the warp at the fell also clears it.

You can look at the video here that Laura Fry did of her weaving. See where the fell is. Hers is not quite half-way to the reed. It is closer to the front beam than mine is. Because of the nature of the warp I have on right now, the weaving goes better when the fell is more than half-way towards the reed.

Another thing that I remember seeing/hearing a number of times is that the ideal place for the fell is where the beater is exactly perpendicular to the fell when the beater reaches it. Laura’s beater is not perpendicular to the fell on the loom she is using, And mine is not either, despite being even closer to the shuttle race. And looking at my loom, the fell would have to be within an inch or so of the resting beater for the beater to be perpendicular to it on arrival. And that would definitely not work.

FASTER WEAVING

One of the amazing results is how much faster I wove! I thought the added quickness was due to not having to constantly flick those loose threads down at the fell clear. And then I went to Volume III of Osterkamp and saw, no, that the weaving will go much faster because you don’t have to pull the beater so far. And she’s right. And the beating is also much easier.

A POTENTIAL DOWNSIDE

But,there is a downside. According to Osterkamp, the closer the beater comes to the front beam (i.e., the closer the fell is to the front beam) the more the beater will pack in the weft. Perhaps subconsciously this is what I had been trying to achieve in the first place. No, I wasn’t that smart. But what I shall have to do is to compare the picks per inch before and after I made this change. If there is a difference, and I suspect there will be, it won’t matter because the whole piece will be cut up for samples. But it does mean that if I want a closer beat I will have to try some things.

  1. Weave with a temple
  2. Double beat
  3. Add another weight to the beater (I already have added one to the bottom; I would add the second to the top)

LEARNING THE HARD WAY

Getting to this point of having a difficult warp that finally weaves easily has been a long schlog. But the long schlog has definitely been worth it. The weaving – even using only pirns and bobbins – goes much more quickly, my body is much more relaxed, and I am enjoying the weaving process much more.

But I have learned something else I think important. Often the answers to questions that weavers ask are either answers about what would be true with an “average” loom, with an “average” warp, with an “average” structure. So the answer might not always work. And if the answer is a specific answer involving a specific loom, a specific warp, a specific structure, that answer will not necessarily be applicable in other instances. This does not mean that answers are unhelpful. It means that answers are often only the beginning of a learning process. It is very useful to have a place to begin!

"Learning the Hard Way" was written by Margaret Carpenter for Talking about Weaving and was originally posted on September 19, 2008. © 2008 Margaret Carpenter aka Peg in South Carolina

Thursday, September 18, 2008

ADJUSTING MY (JACK) LOOM

Posted by Peg in South Carolina

I was weaving this morning, clearing sheds at the selvedge (not at the reed). This is not difficult to do the way I am weaving and on a narrow warp. But weaving with shuttles instead of only pirns? Weaving on a wider warp? Time to investigate further. Besides, this weaving is beginning to put me to sleep....

BOTTOM WARP ENDS LOOSE

I opened each shed. I looked at and felt the warp threads. All the warp threads at the bottom of the shed were pretty loose. I tried adjusting the treadle cords. Fortunately, attached to each treadle is a separate cord that you can use to raise or lower the entire treadle so that I don't have to fuss with individual cords. It's very easy to do. But no matter what I tried, it didn't solve the issue of the soft bottom warp on open sheds.

OSTERKAMP TO THE RESCUE

So I got out Volume Two of my trusty Osterkamp series. It is called Warping Your Loom and Tying on New Warps. It is Chapter 9, "Adjusting Looms," that I turned to.

GUIDE STRINGS

The first thing I did was to realize that I could use my floating selvedge as a guide string. A guide string is a string you stretch from the front beam to the back beam, weight it on each end so that it hangs taut and straight. My floating selvdge does that. It's the same color as the warp so it doesn't serve as a contrast, but I managed anyway.

I learned two things.

  1. I learned that the warp does dip down at the heddles on a closed shed. That is good.
  2. I learned that when the sheds are opened, the top half and the lower half are pretty much equidistant from the guide string. That, too, is good.

Those two things may be good, but that means they don't represent the solution to my problem. So I soldier on and read more. Then I got to an interesting bit about weaving double cloth:

To make sure the sheds are clear enough to weave the bottom layer, advance the warp often and weave closer to the shafts than to the breast beam. (p. 114)

WEAVE CLOSER TO BREAST BEAM

I thought about that. I invariably weave with the fell as close to the front beam as I can. That means that the V of the shed at the fell is very very narrow. I moved the warp up so that it was much closer to the reed. I stepped on a treadle and I knew just what Osterkamp was talking about. That V becomes very wide. The V becoming very side forces the warp ends on the bottom shed to tighten. And it forces them to separate from the top warp ends, not just at the reed, but at the fell. No more soft bottom warp. No more threads not wanting to clear at the fell.

I still had some fiddling to do. The fell was much too close to the reed to be able to weave, and the angle of the warp on the bottom was much too wide. This meant that the warp ends did not lay flat at the bottom. So I messed a bit with where to position the warp and I think I may be on my way.

CHANGING HEIGHT OF BACK BEAM

One more thing. The guide string. When the sheds were opened, the warp ends on the bottom shed actually dipped down just a bit too much. I have been leaving my raddle in in order to raise the back beam. I hadn't tested it out. So many people seemed to have a problem with a too low back beam that I just assumed.......... So I may remove the raddle as well.

Related Post:
Art Piece 3: Reaching the End
Throwing the Shuttle

"Adjusting My (Jack) Loom" was written by Margaret Carpenter for Talking about Weaving and was originally posted on September 18, 2008. © 2008 Margaret Carpenter aka Peg in South Carolina

Wednesday, September 17, 2008

WEAVING CONTINUES ON CRACKLE EXCHANGE PIECE

Posted by Peg in South Carolina

GREEN CHANGES TO TEAL

I have run out of dark green 60/2 bombyx silk.  Dark green is what I started out using for all the background shots.  I happened to have some teal, so I started weaving with that.  I tried to create a transition by alternating the teal and the green in the weaving continues watermarked group of shots with no pattern color.  Not very successful.  I really would have to do this over a longer length for the transition to be effective. 

Nevertheless, this doesn't matter for the crackle exchange since the finished weaving will be cut up into ? sample pieces.  I don't know yet how many pieces I will need as it is too early for the mentor to ask who plans on participating.  It is usually around eight people.

IMAGING SOFTWARE BUMMER

Bent on cleaning out my computer, I go rid of old versions of Paint Shop Pro.  Now when I open Corel Photo Album I can no longer jump from it to Paint Shop Pro.  Instead, I have to open up the files within Paint Shop Pro. Bother, bother.......    Perhaps I could try upgrading to version 7 of Corel Photo Album?


"Weaving Continues on Crackle Exchange Piece" was written by Margaret Carpenter for Talking about Weaving and was originally posted on September 17, 2008. © 2008 Margaret Carpenter aka Peg in South Carolina
Tuesday, September 16, 2008

SHAFT ENVY

Posted by Peg in South Carolina

Alice wrote a post especially for me recently. The post resulted from my comment on an earlier post of hers on shaft envy. Here Alice posted a very interesting draft. Go here to see it. The first two versions of her draft are for a 9-shaft loom, one a floor loom, the other a table loom. the third version is a 16-shaft version. This version is a straight twill threading and all the designing is done in the tieup/treadling. This is important because it means that there is lots and lots you can do with a straight twill threading with no need to change anything but the tieup and threading. And that was the real point of her post.

Well, I have an 8-shaft loom.

I certainly can't do the 16 shaft threading. Schlein challenge

But I thought I would try the original threading on 8 shafts. And here it is. And doesn't it look nice? I thought so.

And then I checked the floats.

This draft doesn't work because there are some very long warp floats on the reverse. And they are right there in that lovely weft-float design area. I haven't analyzed Alice's draft, but I feel sure that that 9th shaft enables tie downs that eliminate those particular floats while still maintaining the design.

Shaft envy..........sigh........

Of course, just because I could do things with 16 (or 12) shafts that I can't with 8 shafts does not mean that I actually would do them. I mean really--how long have I been working with and been fascinated by this 8-block crackle on 4 shafts?! And the dish towels which come next are going to be threaded and treadled straight twill. I will use 8 shafts for them, not because I need them but because it keeps the heddles just a tiny bit farther apart from each other.


"Shaft Envy" was written by Margaret Carpenter for Talking about Weaving and was originally posted on September 16, 2008. © 2008 Margaret Carpenter aka Peg in South Carolina
Monday, September 15, 2008

2009 INTERNATIONAL SURFACE DESIGN ASSOCIATION CONFERENCE

Posted by Peg in South Carolina

The brochure for Off the Grid arrived recently.  Off the Grid is the title of SDA's 2009 International Surface Design Association Conference.  I looked through the brochure I found a surprising amount of lectures and workshops of possible interest to me.  Here is one that stood out in particular.  I quote directly from the brochure.

Radically Familiar: Fiber as a Fine Art Medium:  Numerous international-level artists make use of textiles but don't identify themselves as fiber artists.  How--and why--do they remain Off the Grid of established craft practice?  In answering these questions, we'll examine the roles of textiles, surface design and concept in contemporary art, and compare the cultures and attitudes of fine craft versus fine art. Let's explore this phenomenon together and discuss the implications for our own work.

The presenter is Bean Gilsdorf.  To learn more about this quilt and installation artist, go here.

This is billed as a lecture lasting one hour and fifteen minutes.  I assume there will be discussion.  It seems like a dreadfully short time to discuss such a complex and difficult issue.  Still, I am glad that someone is going to try to address this issue head on.

The workshop that particularly interested me is a four-day pre-conference workshop taught by David Brackett, called The Woven Image.  Here is the statement from the brochure:

The Woven Image: Learn to translate you hand-drawn images into a woven surface.  There are many ways for the weaver to manipulate the interlacement of warp and weft to produce images rather than just pattern.  Looms will be dressed in a way that will allow for the exploration of three techniques:  weft brocade, supplemental warp and pick-up double weave.  Specific exercises will be provided, and there will be plenty of opportunity for individual interpretation.

To learn more about David Brackett, go here.

For more information on the conference and on the Surface Design Association  (SDA), go here.

"2009 International Surface Design Association Conference" was written by Margaret Carpenter for Talking about Weaving and was originally posted on September , 2008. © 2008 Margaret Carpenter aka Peg in South Carolina
Friday, September 12, 2008

A FELTER I AM NOT

Posted by Peg in South Carolina

The online fiber guild that I belong to, The Online Guild of Weavers, Spinners, and Dyers,  has various fiber workshops during the year.  This month, the workshop is on felting.  Felting is something I have been curious about for a long time.  I have been especially curious about it since I wove and My first feltfulled a blanket several years ago.  What the fulling did to the blanket was quite extraordinary.  It produced a soft fabric with a bit of a halo.  There was no mohair in the fiber.  And the fulling totally obscured the seaming I had to do.

Fulling, of course, is not felting.  But it could be considered the early stages of felting.  So when this workshop was offered I jumped at it.  And I learned........

I learned that I am not a felter.

This learning did not occur because of the rather poor piece of felt I produced.  I did get it to felt satisfactorily.  But looking at the underside reveals the unevenness with which I applied the layers of tops. To get that right takes only practice.

But what I really didn't like was the top layer, which you see in the photo. Over the three white layers I decided to put on a bit of multi-colored blue fiber from another fine coated breed.  I laid this top layer on thinly because I though I would try for a transparent kind of effect.  Well, I don't like it at all.  There is just too much contrast between the white of the base layers and the blue of the final layer.  Also, that top layer, though it seems quite secure, still seems like a top layer because it didn't really fuse with the merino layers as I had hoped.  Perhaps I needed to work harder or longer.  But I was tired.

Anyway, it is not the result I got which discouraged me.  I just didn't particularly enjoy the process. 

I went to my favorite felting book to share it with you.  It is this book which really encouraged me to do the workshop. When I opened it, the pages fell open to the chapter on cobweb felt, and there it was.  There was the picture of what I had done!  I didn't care for it in that picture either..........

The book, by the way, is by Sheila Smith and is called Felt to Stitch: Creative Felting for Textile Artists. Go here to learn more about the book.  And if you have the book, the page number for the cobweb picture is page 113.

The workshop is not over;  it runs for the entire month of September.  I may try more.  I may try machine embroidering this piece.  I am glad I made this little piece of felt.  Sometimes a person has to try something new just to rev up the brain;  just to learn that the path he is temporarily leaving is merely a detour; just to learn to appreciate more fully the work of other fiber artists.

"A Felter I am Not" was written by Margaret Carpenter for Talking about Weaving and was originally posted on September 12, 2008. © 2008 Margaret Carpenter aka Peg in South Carolina
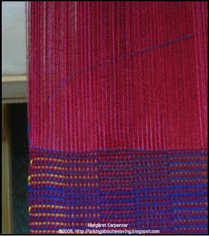
Thursday, September 11, 2008

COLOR AND NEXT ART PIECES

Posted by Peg in South Carolina 

Jane must be psychic.  She has got it right (which, frightening as it is, she frequently does.......) when she made the following comment on my blog:

"Maybe you will find yourself working your way through the spectrum, and your gorgeous reds are just the beginning"

I have already started thinking about the next set of art pieces and my thinking involves blues and greens.  That is not something totally different from the red pieces I have just finished.   I used a lot of blue and a lot of green in a number of the pieces.  I may not be precisely working my way through the spectrum.  To do that I would be moving either to oranges and yellows, on the one hand, or to red-violets and violets on the other hand.  But I am still following a logical path from one group of pieces to the next. And I had not realized this until I read Jane's comment.  Thank you, Jane!

And yes, there are going to be bits of red in these new pieces. 

"Color and Next Art Pieces" was written by Margaret Carpenter for Talking about Weaving and was originally posted on September 11, 2008. © 2008 Margaret Carpenter aka Peg in South Carolina

Wednesday, September 10, 2008

RECENT POSTS FROM OTHER BLOGS

Posted by Peg in South Carolina

Wow! Laura Fry has started a blog.  It's called Weaving a Life.  Read her first two posts.
In the Beginning   
In the Beginning, part II  

When the Stars Align -- Woven Thoughts
A Weaving Primer, Part 2 -- House of Wool Repute
First FO from Floor Loom, Questions About New Table Loom -- Taueret
The Web Begins -- Material Thoughts
Bamboo-Silk Finished Shots -- Feberewetopia
There are Good Times and Bad Times  -- A Movable Feast
Weaving for the GCW Exchange Project -- Thrums
Dumb Weaving Tricks -- Sleeping Dog Weaving
Out of the Box -- Works in Progress
Upgraded My Sectional Beam   http://travelingtiger.com/blog/2008/09/07/upgraded-my-sectional-beam/    Tien's Blog
Woven Bracelets -- Delicate Dimensions  (an older post by Nicki on a blog of hers I have just discovered)
Weaving -- Sharing the Fiber Fever  (This includes a video of her weaving.  I noticed immediately how she bends from the  hip and keeps a beautifully straight back.)

Two related posts from Weaverly, one of them an "oops!) moment
Watery  
The Best Laid Plans   

Two related posts from Constance Rose Textile Design
Seriously Beautiful  
Another fortuitous Mind-Change   

Weaving: What's Next? -- Leigh's Fiber Journal
Been Thinking -- Sampling
My (Mini) Warping Station -- The Weaving Studio
First Day in Big School  -- Fibres of Being
Weaving a Way -- Cyber Fiber Scriber
My Good Donkey -- Avalanche Looms
Weaving Begun on Scarf -- Centerweave
Less is More   http://www.rockartifacts.com/shuttlepilot/?p=68    Shuttle Pilot
Setting Up for Colour and Weave -- Dot's Fibre to Fabric
Erica's Looonnnnnggggg Weaving Project -- River City Weaves
Weaving on a Jacquard Loom at Convergence -- Sandra's Loom Blog  
Blanket! -- t'katch (I noted the lovely hand hemming........)

Artists, like athletes, need to self-train:
Unconscious Confidence -- The Painters' Keys

"Recent Posts From Other Blogs" was written by Margaret Carpenter for Talking about Weaving and was originally posted on September 10, 2008. © 2008 Margaret Carpenter aka Peg in South Carolina

Tuesday, September 9, 2008

WEAVING BEGINS ON CRACKLE EXCHANGE SAMPLES

Posted by Peg in South Carolina

TREADLING AND COLOR

In each block I treadled the pattern color only on shaft 5. Between each block with pattern color on shaft 5, I treadled Weaving begun a transition group using only the background color--green. For this group I treadled 2 sets of treadles 3 through 8.

A reminder. The treadling is polychrome treadling with no tabbies.

I changed pattern colors with each block group. The colors are pale yellow, lime green, pink and light green. I did not do them exactly sequentially but devised the following order. Letting small letters represent the colors, here is the scheme:

1. a, b,
2. a, b, c
3. b, c
4. b, c, d
etc.

There are a total of eight groups and finishing them brings me back round to the beginning.

I have been rather enjoying this. It is more rapid and relaxing weaving than the art pieces were, but the color scheme helps keep any boredom at bay. It's still not speed weaving, however. I continue to weave with the bobbins themselves rather than putting them in the shuttles.

PHOTOGRAPHY ISSUES

Getting the color right in this photo was very difficult. The first thing that happened when I started the photo session was very strange. The reds came blue. I tried different settings but nothing worked. This had never happened to me before so I was quite befuddled. The light I use is overhead lighting from a ceiling light/fan. The secondary lights are a small lamp on each side of the loom. There is some natural light that comes in from the windows, but this does not seem to confuse the camera particularly. And I turn off the florescent light in the neighboring kitchen.

What was going on?

I looked at the lamp bulbs. My husband had changed one of them to one of those energy saving florescent tube things. I turned it off and all was well. Not completely well as there were still difficulties.

There were two difficulties.

  • Getting the red the correct shade
  • Getting the pattern colors in the center and at the end to light up

I managed to get the reds pretty close by playing with balancing red and green in my software. The problem with the pattern colors is that, though they show pretty well were they should (in the end blocks and in the two blocks on either side of center), they show up too well in some of the other blocks. In reality, they do show up there but with much more of a shadowy effect, and effect I quite like.

The other color problem is that when woven, the light yellow and the lime green look exactly alike. They both just look like yellow. In this particular dark and rather intense warp, I would need to have the yellow and the lime green both be probably Yellow amd lime bobbins at full saturation instead of as light as they are.

But take a look at them on the bobbins.


Related Posts:

Polychrome Treadling Writ Large
8 Crackle Blocks on 4 Shafts Continued

"Weaving Begins on Crackle Exchange Samples" was written by Margaret Carpenter for Talking about Weaving and was originally posted on September 9, 2008. © 2008 Margaret Carpenter aka Peg in South Carolina

Monday, September 8, 2008

I LOVE YOUR BLOG AWARD

Posted by Peg in South Carolina

image

Awarded to me by Leigh. who I thought was a friend (grin!). Actually, however, this is a delightful award because I don't have to write any essays or confess to any shortcomings. My only problem has been trying to figure out which four bloggers to choose. I know, four is the minimum number so I could add more, but I think four is a good number. So here they are.

Sandra's Loom Blog -- a multi-shaft weaver using her own hand-dyed fine silk yarns to create amazingly beautiful cloth.

The Straight of the Goods -- I love reading about her forays with her new-to-her countermarch loom.

Cyber Fiber Scriber -- Nicki is nothing short of an absolutely brilliant weaver. She doesn't post very much because she is so busy inventing, creating and weaving. I am so pleased that she takes the time she does to share with us her creative adventures.

Constance Rose Textile Design -- an explorer in the production of beautiful woven art work.

Here's what goes along with receiving this award:

1. Post this award on your blog.
2. Add a link to the person who awarded you.
3. Nominate at least 4 other bloggers, and add their links as well.
4. Leave a comment at the new recipients' blogs, so they can pass it on.

"I Love Your Blog Award" was written by Margaret Carpenter for Talking about Weaving and was originally posted on September 4, 2008. © 2008 Margaret Carpenter aka Peg in South Carolina

Friday, September 5, 2008

SELF PORTRAITS, LANDSCAPES AND CRACKLE

Posted by Peg in South Carolina

What follows is a series of musings, the kind that can happen when one keeps a journal. These led me seemingly inevitably to the last paragraph.  In that paragraph I found myself at a place I never wanted to find myself.

SELF PORTRAITS

I stumbled recently upon a tapestry self-portrait. Go here to view it.  It is very abstract, created by tapestry artist Patricia Dunn in 2002.  Here is her statement about the piece: 

"Using colors, the palette, to express an idea of myself"


Go here to view it. To see her entire web site, go here.

Looking at her piece I see much that looks like the kind of 8-blocks-on-four-shafts crackle I have been engaging with.  Perhaps my next set of art pieces could be a series of self-portraits.

CHOOSING APPROPRIATE COLORS

But how would I choose the colors?  Clearly I love red.  But I am not that kind of out-going, exuberant, devil-may-care type of person that I would associate with red.  And much as I love color, I don't associate myself with any particular colors.  Red and black strikes emotional chords.  I love red and black.  But that is for a dramatic personality with lots of flair.  Perhaps there is a side of me I do not know?  Perhaps there is wish to be something I am not?

A POSSIBLE CHALLENGE

It would be interesting to issue a challenge to weavers to create a self portrait. Any structure except tapestry. Include a brief artist statement.

LANDSCAPES

Back to Patricia Dunn.  I also looked at her landscapes.  Go here to see those.  Though these too are tapestries, the effects of many of them remind me very much of my current crackle studies.  Canyon 6 #2 I find especially crackle-like in appearance. Perhaps I, too, could use landscape to inspire my crackle studies.

Finally, what may be my favorite tapestry by Dunn. Under a heading called Zacatecas there is a lovely crackle--like tapestry all in shades of red.  It is called Zacatecas 3:Desert Dancers.  Go here to view it.  Yes, red does speak to me.  But why?

THINKING LIKE AN ARTIST

Perhaps I am getting to the point that I need to start thinking like an artist.  By this I mean, or at least I think I mean (!), looking both inside and outside of myself for inspiration and then trying to express what I find.  This is a strange point to find myself.

Related Post: 8 Crackle Blocks on 4 Shafts

"Self Portraits, Landscapes and Crackle" was written by Margaret Carpenter for Talking about Weaving and was originally posted on September 4, 2008. © 2008 Margaret Carpenter aka Peg in South Carolina

Thursday, September 4, 2008

ART PIECE 5 READY FOR HANGING

Posted by Peg in South Carolina

Here it is.  I used monofilament for hanging it on the wall.  Then, for purposes of taking this photo, I just taped the top of the Art Piece 5 hanging on wall monofilament to the wall with masking tape. The piece is ready to be mailed.

Well, not quite ready.  I have received the letter of acceptance for the Blue Ridge Show.  Now I am waiting for the sending information.  Then I can figure out how to ready it for mailing.

Now to wait for Hannah to hit. A few hours ago the radar showed it landing right where I live (some 75 miles inland), but it keeps changing.  My very first hurricane since moving to South Carolina.  Strangely, I am more excited than frightened;  that will probably change..........


"Art Piece 5 Ready for Hanging" was written by Margaret Carpenter for Talking about Weaving and was originally posted on September 4, 2008. © 2008 Margaret Carpenter aka Peg in South Carolina

Wednesday, September 3, 2008

JACK AND COUNTERMARCH LOOMS

Posted by Peg in South Carolina

My first floor loom was a counter balance loom by LeClerc. I had gone to a lot of effort trying to decide between a jack and a counter balance. I asked questions of the weaving list. I read books. I was finely persuaded to buy the counter balance. JoAnne Hall thought that would be a good purchase. And Rachel Brown, who was my first weaving heroine, wrote in her book The Weaving,Spinning and Dyeing Book, that every weaving workshop ought to have a counter balance loom as one of its looms because it wove 4-shaft drafts so easily and quickly.

My first loom So here is the loom I purchased: a LeClerc Nilus II CB with a shed regulator. CB looms weave easily drafts which balance two shafts up against two shafts down. But weaving with one shaft up and three down, or the reverse, is sometimes difficult to do this on a CB loom. The shed regulator solves the problem. The shed regulator is that piece of equipment sitting on top of the loom. It is attached to the side beams with those slightly triangular pieces of wood on either side. To this is attached that top rod with a cord mechanism which you can adjust one way if you want to treadle one shaft up and three down. And you can adjust it the other way so that you can treadle one shaft down and three up. For a better view of it, go to this page and this page on the Leclerc web site.

When I purchased this loom, I thought that a 4-shafts loom would meet all my weaving wants/desires for the rest of my life. No so. After weaving on the loom for three years, I started investigated 8-shaft jack looms and 8-shaft countermarch looms. I thought carefully about a countermarch loom. A CM loom has the advantages of a CB loom insofar as shafts are pulled down (as well as raised up). This pulling down creates a big shed and a clean shed. I really wanted that. What I didn't want to have to do is to wrestle with CM tie-ups! They seemed to be a pain in the you-know-what!

Well, tying up treadles in general is no picnic. However, despite my being a woman of uncertain age, I am still quite agile. But I do not know how much longer I can fight off the inevitabilities of ageing. So I was very tempted by the LeClerc Nilus II jack with rear-hinged treadled. This loom seemed to have some of the advantages of a CM loom insofar as it had rear-hinged treadles, it had springs attached at the back to the treadles which could be adjusted, and it had some additional ability to manipulate the treadle cords. So I purchased it.

Alas, I could not keep my CB loom. Space and finances. So I sold it.

I very much like this loom, but I still have occasion to wish it were a CM. Whenever I discover a warp yarn that just plain stayed up instead of going down, I wish it were a CM loom. Side mirrors don't help here because the error is not visible.

On the other hand, I realize that the problems I am having with this current warp about clearing sheds might not be solved with a CM loom. The sheds are perfectly clear up at the shuttle race. Where they are not always clear is down at the fell. Since this happens primarily with only one shed on one threading block and secondarily with one other shed on a different threading block, the problem seems to be with the threading/tie-up. And by the time I have finished treadling the set of treadles, all the warp ends are equally taut.

I am also beginning to play more with those springs at the back, specifically with the springs that operate on the treadles treadles viewed from rear where the problem is. In the photo you can see a spring attached to each treadle with a Texsolv loop cord. The loop cord allows you to adjust how tight you want the spring to be. I have tried tightening up those springs a bit, and that may be helping. I may try tightening them up once more.

But the loosening threads at the fell does create a problem with the laying in of the weft. The weft will not always lay in correctly and can bunch and cause little loops, both at the selvedges and in the areas where the warp threads are a little loose. That is why I hand clear.

As I come to understand this, I am feel less in need of a CM loom.

Some posts on countermarch looms from other blogs:

Comparing Looms: Jack & Countermarche From Leigh's Fiber Journal
Some Countermarch Nitty-gritty: Size, Sheds and Texsolv From The Straight of the Goods
Treadle Tieup and Threading From Dot's Fiber to Fabric

Related Posts:
Ergonomics at the Loom
Never Touch the Selvedges

"Jack and Countermarch Looms" was written by Margaret Carpenter for Talking about Weaving and was originally posted on September 3, 2008. © 2008 Margaret Carpenter aka Peg in South Carolina

Tuesday, September 2, 2008

NEVER TOUCH THE SELVEDGES

Posted by Peg in South Carolina

When I was a beginning weaver, I was told over and over again not to touch the selvedges when I was weaving. Just keep throwing the shuttle and beating. This was very hard to do, for my selvedges were quite awful. I continued bravely on in weft caught by warp ends2 this manner, and my selvedges did improve. Obtaining an end feed shuttle further improved the selvedges. And the occasional use of a temple also helped.

Weaving these art pieces, I have started touching the selvedges. Horror! Actually, I really only started with this fifth piece. I was already having to put in my hands on occasional to clear sheds. And my selvedges were really pretty good. Then I found that the solution to the occasional little loops at the selvedges was to give a little pull on the yarn I had just passed through, after I had changed sheds.

Then I started to notice the the weft yarn was not always quite hugging the selvedge close to the previous shot of weft yarn. Sometime this was due to the weft yarn getting caught on warp yarns near the selvedge that had not quite cleared completely. The first image shows what happened to a shot of seft when it got caught by some loose warp ends. Instead of angling at a relative narrow angle from the left selvedge, it scoops up and over. This generally happens on only one particular shed where the threads in one threading block loosen up (I've still not figured that one out).

I can avoid this situation if I make sure that shed is clear, clearing it with my hand, if necessary. But when I haven't noticed this, I end up having to stick my finger in the open shed and clear it before I beat. And that is what the second photo shows me doing.

inserting finger to clear warp ends2 After I have cleared the shed I can pull on the weft yarn again and it willl angle correctly from the selvedge.

Sometimes there are no loose warp ends grabbing at the weft yarns, but the weft still doesn't quite snuggle into the selvedge the way it should. For no apparent reason. Again, a finger into the open shed to nudge that weft end down before I beat as you can see in the third photo.

If I were production weaver, I would never weave this way. If I found that I had to do these things to get good selvedges, I would try to find ways that would correct the issue. I would try a temple. This would stretch the warp threads out their full width, including the ends close to the selvedge which always get closer to each other than the rest of the ends do. I would try opening up the sett so that the ends would not be so likely to stick to each other.

snuggling the weft end to the selvedge2 But I am not doing production weaving. I am trying to create one-of-a-kind pieces and the weaving is slow. I do not want to use a temple because it obscures my vision a bit, even though I use the Scandinavian metal temples. I do not want to open up the sett because I like how it looks at this sett.

It is, however, good advice not to touch the selvedges when you are weaving. It is good for a weaver to learn that, with practice, she can just throw shuttles and get decent selvedges. But the key is practice. Constant, or even intermittent, touching of the selvedges is going to get in the way of the learning curve.

Related Posts:
Slow Weaving
Preparing for Weaving

"Never Touch the Selvedges" was written by Margaret Carpenter for Talking about Weaving and was originally posted on September 2 , 2008. © 2008 Margaret Carpenter aka Peg in South Carolina