I have just finished winding five skeins of tassar silk organzine from Habu Textiles. It seemed awfully fine to me. Too fine? I checked the yardage. 60/2 bombyx silk has 15,000 yards per pound. The n-12 silk organzine from Habu has roughly 32,000 yards per pound. Not what I wanted.
How did I get sucked in? Well, when I ordered the yarn from Habu, the one I wanted they did not have and they suggested this as an equivalent. The recommended epi is 30-60. The recommended epi for silk runs around 60-72, So I thought, fine.
VISUAL COMPARISONS
Not fine. But then I looked at the two yarns, the 60/2 bombyx and the n-12 organzine, side by side; frankly, the bombyx looked thinner. That can't be right! The bombyx weighs twice as much as the organzine!
Then I hooked a loop of the one around a loop of the other; the bombyx still looked a fraction thinner. Then I doubled the two yarns and hooked a loop of one doubled yarn around a loop of the other doubled yarn. Now the bombyx no longer looked thinner. But perhaps the organzine looked just a trifle thinner? Perhaps?
Doubts began to creep in. Should I use the organzine? Or was I just trying to rationalize not having to make more skeins?
SOFTNESS
The organzine is clearly softer than the bombyx. Perhaps the softness builds up thickness. Perhaps this is why Habu suggests an epi that can go as low as 30?
Softness in wool or cotton yarn certainly results in a bulkier yarn. Spinning worsted style results in a harder, and consequently thinner, yarn than does spinning woolen style.
But will it beat down to the equivalent of a 120/2 bombyx in the process of weaving? Will I need to adjust my beat to keep the organzine the soft thickness it has?
I AM GETTING INTRIGUED
Clearly there are lots of questions. Only weaving with the yarn can answer these questions. Sooooooooooooo....................I'm going with the organzine. The risk, of course, is, that I may have dyed a whole lot of yarn to no purpose. But that should show itself fairly quickly and I can save the rest of it for another project.
The Habu website does say that it makes both good warp and weft. I'm hesitant to use it as warp for in winding the skein I had one problem with the yarn unplying for a few inches. I had to unwind back to that problem area and knot a new yarn on.
Habu has wonderful yarns. Not just silk, but paper, bamboo, wool, cashmere. Check them out here.
Monday, March 31, 2008
ELECTRIC SPINNER QUESTION
bspinner suggested I might want to get a Woolee Winder for my electric spinner. The reason is that "it makes spinning so much more efficient."
She is right about the Woolee Winder. I have one on my Ashford and it turned my Ashford from an OK wheel to a wonderful wheel. Woolee Winders (and their bobbins), however, do not come cheaply. The cost would be more than that of my electric wheel!
I think it is silly to upgrade a wheel that hopefully I will replace anyway the next time it dies. My hope than is to get a better quality electric wheel and one with a Woolee Winder as well.
To find out more about Woolie Winders, go here.
Friday, March 28, 2008
SPINNING WEAVING YARN WITH AN ELECTRIC SPINNER

I really like to put on an occasional warp of yarn that I have spun and weave it off. It is so completely different from the crackle journey I am on. But it has always taken so long for me to spin enough yarn for weaving that I have done very little weaving with it. And I am not willing to devote huge chunks of my time to spinning.
BEGINNINGS
A year ago Christmas I was gifted with an electric spinning wheel. I had asked for it. I had been spinning for several years quite happily with my Ashford Traveller double drive. I did not know how I would like spinning with an electric wheel. So I asked for the cheapest one available.
BABE
The Babe I got was the cheapest one they make. I don't think they even make this particular model any more. Spinning on it was very different from spinning on my Ashford Traveller, even with the high speed-flyer. After awhile I got the hang of it and sort of enjoyed it. But after a few months I stopped using it. I just did not get to the point of its really being fun.
NEW FOOT CONTROLLER
Then about a month before this Christmas I started spinning on it again. I decided I did not like the electronic foot controller so I purchased another one on an Ebay site. It worked better than the one that came with the electric wheel. I was happier. But still I was not totally happy. Nevertheless, I continued to spin on it.
DEAD MOTOR
Then one day I sat down to spin only to discover that the motor had died. I am sure it had not overheated and burned out. It just died. What to do? I am not at all mechanical. Just taking off the old foot controller and putting on a new one was nothing short of terrifying. Well, actually trying to find the right one was not exactly a walk in the park.
WRONG MOTOR
A couple of blocks from our house is a Singer sewing machine and also a vacuum cleaner dealer. He just happens to repair small motors. So I took the wheel in to him. Of course I had to explain. In less than 15 minutes he had put on a new motor. This motor, he said, was identical to the original.
NEW MOTOR
I took it home. It spun the wrong way---counter clockwise instead of clockwise. I won't know go into my initial disappointment in not being able to set up this machine to ply........... So I took it back. It needed a reverse motor. He had to order it. Four days later I had my spinning machine back and started spinning.
It spun like I had a whole different electric wheel. It spun smoothly. It accelerated fairly gradually. And I had a great deal more control over the speed. So now my poor Ashford sits, not unused, but not used very much. At the moment I am spinning a very very fine merino on it, something that is taking me ages but which the electric wheel could not handle because the draw is too strong.
CURRENT SPINNING PROJECT
I am spinning some gorgeous fiber. That's it on my Babe electric at the top of the page. It is from Crosspatch Creations and is sold by The Bellwether. I have spun their stuff before and have woven with the resulting yarn and it has always turned out marvelously soft.
Now, with this electric wheel I realize that it is much more realistic for me to spin for weaving because I can spin so quickly. I just spun 4 ounces of fiber in less than a week without really trying. With the other wheel, it would take me a month, maybe longer to spin that much fiber. At least devoting the kind of time I am willing to devote to spinning.
I am so excited by this current project. I have another 4 ounces. And I see The Bellwether has a marvelous darkish green by Crosspatch Creations that would be perfect................ Ohh, I really want to put on a handspun warp after this next crackle project................. I've even cast my eye on some possible drawdowns...........
Related Post: Spinning for Weaving
QUESTIONS ON PREPARING WARP BOUTS
Janice asked two questions about my warp preparation process: "I know you have used Angel Wings in the past. When do you put the lease sticks in those? Finally, why do you wind lots of small warp bouts rather than one or two larger ones?"
ANGEL WINGS
Angel Wings are an accessory made by Purrington Looms. They are designed to hold your lease sticks at either the front or the back beam while you warp the loom. Also, if you keep your lease sticks in while you weave, they are helpful To see what they look like, click here, go to accessories, and scroll down the page until you get to Angel Wings.
With my current warping technique I do not use Angel Wings. To use Angel Wings, the warp has to be level. When I am ready to beam on, I throw the warp up over the top of the loom. I trust that this will become clearer in future posts.
The last two warps I did not leave my lease sticks in while I wove. Instead, I left the raddle on the loom. This seemed to work very well.
WHY SMALL BOUTS?
I wind lots of small bouts because silk is very very slippery and delights in twisting around itself. Bombyx silk is what I am using and that is one of the most slippery silks there is. (I am using a silk that is even more slippery for the weft, however.)
This love of twisting was evident even in the stage of inserting rod and lease sticks. But sometimes when I get to the raddling, I see more twists that I hadn't caught at this first stage.
When I beam on, the warp continues to want to twist as it moves towards the lease sticks. Really really twists. I am continually untwisting. Even with choke ties on, those funky silk warps want to twist. This is where small bouts are invaluable. It is much much easier to control that twisting with small individual bouts than with large bouts.
Also, when I beam on, I attach weights to the warp bouts. With the small bouts of slippery yarn there is less chance of lengthwise slippage than there would be with large bouts.
In short, small bouts make for a better warp.
Thursday, March 27, 2008
PREPARING THE WARP BOUTS FOR THE LOOM
 Trust me, I am keeping my eye on kitty! I've brought the wound bouts into the dining room, laid them on the table and slipped the back beam rod through the loops at the end of the crosses. I've slipped the lease sticks through the crosses. But..........all is not well!
I looked carefully at all the warps, examining how the came through the lease sticks and onto the rod. Keeping one eye on kitty.......... On your left you see what I found: a twisted bout. It twists as it leaves the lease stick closest to the rod and moves to the rod. The lease stick is in wrong. So I slipped out the lease stick, re-arranged the cross, and all is well.
And here is the loom, waiting for the warp. The raddle is on (yes I made it, and the nails are very crooked). Paper is over the nails to keep the warp from slipping into the wrong places. Sticks are placed to support the lease sticks and rods. And a table is there ready for me to pull the back rod down onto.

RETHINKING COLORS
I had made all those careful plans vis-a-vis color. I had made all those dye samples. And then I discarded everything.
Perhaps that is a bit of an exaggeration. But weaving that sampler did force some changes. First of all there was the red part of the sampler. One of these two scarves coming up just must have red as a dominant color. Not just the warp. Weft too.
I love red. So the first scarf will have nothing to do with all those original careful plans vis-a-vis color. It will be mostly in blues and reds.
The second scarf, however, will still follow the original plan of neutrals and blues as the dominant colors. So the dyeing plans are not totally thrown out. The neutral samples are invaluable here.
However, for the blues, and for the blues and the reds in the first scarf, I have to have many variations of each color. That was probably the most important thing I learned from the sampling. It doesn't matter whether I am going to treadle polychrome style (the first scarf), or Summer and Winter tromp as writ (the second scarf). I need multiple variations of the colors.
What I did, when I realized this, was to go to my ring binder of dye samplers and look at all the reds and blues there. From these I picked out the ones I liked. My plan right now is to dye five skeins of different reds and six skeins of different blues. Plus some other colors. Including neutrals.
I'm going to be spending a fair amount of time sweating over dye pots!
Related posts:
Next Crackle Project: Dyeing Plans Begun
Dyeing Sampling Update
Dyeing: Some Discoveries
Designing and Color
Wednesday, March 26, 2008
HERE ARE THE WARP BOUTS
 The bouts are made. Even the floating selvedge warps are made. They are wound on the knitting bobbins at the top of the photo. I keep the individual bouts in sandwich-size plastic bags to keep them from tangling. Also to keep them clean. The ends with the cross peek out of the bags so that I will be able to slip in the rod and lease sticks.
FOUR ENDS AT A TIME WITH SIX CONES?
When I started making the warp, I worried that I might have some problems. I had wound six cones of yarn, three of each color red. However, I was going to wind four ends at a time. Why didn't I wind four cones (two of each color) to begin with? It's called hindsight.
This is what I ended up doing, and I wasn't sure it was going to work. I started with four cones and wound one bout. Then I removed a cone and replaced it with one of the two unused cones. I wound a second bout. Then I removed a different cone and replaced it with the remaining unused cone. Now I have two cones that have been used once but are now out of commission. After I wound this next bout, I removed another cone, and replaced it with one of the out-of-commission cones. I kept doing this until I had wound all six bouts. And it worked. I never ran out of yarn. In fact, I have plenty of yarn left over.
KNOTS
As I was winding the warp, I ran into the expected knots. Three of them were at one end or the other of the bout, so I didn't have to do anything with them. Two others were in the middle. My usual tactic when encountering knots in this situation is just to keep going. has always seemed easier to do that and then fix the warp when I was weaving that it was to pull one end back to the beginning, replace it, and wind it back to join its fellow ends.
But I decided to try.
I was pleased to discover that it is not that hard to cut out an end with a knot when the warp is only a little less than seven yards, even when warping with four ends at a time. Now I don't have to worry about cutting out a knot when I am actually weaving, and I will also not have the doubled warp ends that cutting out knots entail.
Related Post: Another Raddling Tip
Tuesday, March 25, 2008
WEAVING AS EXPLORATION
How would I feel if I were to lose something I had woven? If something I had woven were stolen. Meg knows. To read her post about the event, "I'm a Victim of Art Theft?!" go here.
As for me, I do not know how I would feel.
Robert Genn recently wrote a piece about his experience of having had a painting he was working stolen. He describes how it felt to have lost it: it was as if he had lost a part of his own body. To quote him here:
I began to think my painting was the best thing I'd ever done,
unrepeatable, irreplaceable. The more I thought about it, the
more I boiled. Unlike the fish that got away, the art we make
is part of us, part of our very body, and unless we willingly
sell or give it, losing it like that is a supreme insult.
He thought of posting a reward for finding the painting. But then he changed his mind. What had suddenly become precious to him was not the painting, which he now realized was very ordinary, but the emotions arising from his momentary belief that this painting was or could have been a masterpiece.
I especially like his postscript at the end of his essay: "Angels fly because they take themselves lightly." (G.K. Chesterton)
But this is not the end, because Genn continues:
"When all is only exercise and experiment, where questions give more delight than answers, and results are the lesser of process, we are given a special kind of energy."
These words ring so true to my experience. In weaving, I love the process of exercise and experiment and questions being raised and possibilities being pursued. Hence my love of weaving samples. This is the kind of zone I like to be in and weaving samples can put me straight into it. I have so much enjoyed exploring this 8-blocks-on-4-shafts crackle. It has been an amazing experience. Probably the experience has been more amazing than the samples!
But now I am moving from samples to scarves. I am preparing to weave "something." Actually two "somethings." Something I might wear. Something I might give to someone else. Something I might submit to a show. But definitely a "something." Not a sample.
And so a certain kind of "seriousness" enters the picture. The greater this seriousness, the less energy there is.
Right now there are two things that are helping to keep the play and delight and energy going.
First, I do not know how these scarves are going to turn out. I do not know what they are going to look like. I have worked out the colors I am going to dye the silk. I have worked out the threading. I have worked out the sett. I have the yarns I am going to dye. I have worked out the treadling. And I have a general idea of how I am going to place the colors.
But as of right now I do not know the details. I have some idea of some of the details, but I do not know precisely how I am going to flesh them out on the canvas of the silk warp.
Each time I start I new block, I will have to make a decision as to what the colors will be, the order of the colors. I do have a general plan for changing the colors from block to block. But I do not know how that plan is going to manifest itself.
Even my plan to weave the blocks all the same size is subject to change, depending on what I see happening as I weave.
I am even planning to dye some small skeins in some spark colors that are not in my plan. And, once the dyeing is done, I am going to look at the silk yarn I have previously dyed just to see if there is anything there that strikes my fancy for using on this warp.
Second, I see this weaving as another kind of sampling. I see this weaving as preparation for the weaving that will come next, the weaving that will arise out what I am now doing. And I will be making notes of the ideas that come to me as I weave, ideas that I won't be able to use on the current weaving, but that may find a home in another piece.
Yes, for me weaving is about exploring. So, though I am sure that I would mourn a lost or stolen piece, I suspect that I would not mourn for long.
Go here to read the whole of Genn's piece.
Related Post: Originality
Monday, March 24, 2008
WARPING PADDLE

I use my paddle as a stationary paddle. Some people prefer to carry the paddle as the wind on the warp. When I have tried to do that, I get into a complete muddle at the cross.
Here is my warping paddle close up and in use. Because of the angle, you can't see that it consists of alternating holes and slots, just like a rigid heddle.
HOLES AND SLOTS
Four threads are coming up from four cones. Each one goes through a hole or a slot. The ends in the slot can be moved either to the right or to the left. The threads in the holes are always stationary because they cannot move. And that is the secret of the warping paddle.
As the four warp ends emerge from the top of the paddle, I grab them with my hand and wind them up to the top of the warping board. I stop short of the crossing pegs.
TWO FINGERS IN THE CROSS
Holding on to the four ends at the top of the board with my left hand, I reach down under the paddle with my right hand. I uses my right hand to grab the warp ends coming from underneath the paddle. I move those warp ends to my right. But only two warp ends move: those in the slots. The other two are stationary because they are in the holes.
FIRST HALF OF CROSS
There is now a space between the stationary warp ends and the moved warp ends. This space is not only underneath the paddle, it also appears above the paddle. I insert a finger of my left hand into the space between the yarns that appears above the paddle.
SECOND HALF OF CROSS
Next I move my right hand (still holding the four warp ends) underneath the paddle from my right to my left. This creates another space. The warps that are threaded through the slots now move the left. The space is visible between the top of the paddle and the warp ends threaded over one finger of my left hand. I put a second left-hand finger through this second space.
Now my two fingers are holding the cross. I put one section of the cross on one peg; I put the other section on the second peg.
RETURN TRIP
I then take those four ends and go round the end peg. I make the cross with the paddle again, getting the cross on my two fingers. I put each section of the cross on a peg and then run the four ends back down to the beginning.
TWO HELPFUL BOOKS
Peggy Osterkamp, Winding a Warp and Using a Paddle, pp. 67-84. She explains and illustrates how to use both a slot-and-hold paddle (both stationary and carry-around) and an all-holes paddle. If you've got this you don't need another book.......
but if you can't help yourself..........
Leslie Voiers, Workshop Notes for Winding Multi-Colored Warps with a Warping Paddle Using the Warping Board Frame or the Upright Warping Reel. Though Osterkamp has written (written very well) all you need to know about using the paddle, Voiers has included lots of tips that can be very useful. However, she does limit herself to carry-around paddles (both stationary and all-holes).
Related Post: Warping Work Station with Coffee
More on False Crosses
I received a couple of good questions on my earlier discussion of crosses and false crosses.
Leigh asked: "Aren't [false crosses] the result of using a warping paddle...?"
The answer is "yes." However, my guess is that they would occur if you warped with more than one thread but using your fingers to separate them and then to create the thread-by-thread cross at the cross end of the warp. A paddle is just a bit more efficient than fingers and you can work with more than four ends, which is the maximum you could use with fingers.
Indeed, if you set up a rigid heddle (the hole-and-slot kind found on rigid heddle looms) instead of a paddle to make the crosses, you could wind even more threads than the paddle allows.
FALSE CROSS WITH A SINGLE END
Also, a false cross will occur if you wind incorrectly with only a single end. I have tried to use a lime-green line to indicate the path the thread would take if you made the cross correctly. Clicking on the photos will result in a larger and clearer picture of the lime-green line.
After making the cross (correctly shown by the actual crossed red threads on the right), you draw the yarn (now the lime-green line) straight across to the top of the peg on the left, go around and under that peg under the peg to its right and than continue with the making the second half of the cross.
 Some people do not do this. And some people do it correctly but occasionally make a mistake. The mistake is shown in the following photo, again indicated by the lime-green line. Here, instead of continuing with the yarn straight across, the yarn is brought to the underside of that first peg, then around it to the top, then back to the right and down to the underside of the second peg on the right.

MULTIPLE ENDS WITH NO FALSE CROSS
Anonymous asked another question:
"Peg, please describe in detail how the false cross occurs, I just can't figure it out. I almost always wind warps with multiple ends "in-hand" and have never had or seen a false cross."
I am afraid I can't explain how the false cross occurs. The next time I make a warp I will try to analyze what is actually going on.
What I can't figure out is why you don't get one! My guess is that you are literally carrying the ends "in-hand." I interpret that to mean that you are treating them as a single yarn. What this would mean is that you are not separating out the individual ends to make thread by thread crosses but are treating them as a single end and so making a group cross. Making a group cross would create no problem of a false cross between those first two pegs.
Leigh asked: "Aren't [false crosses] the result of using a warping paddle...?"
The answer is "yes." However, my guess is that they would occur if you warped with more than one thread but using your fingers to separate them and then to create the thread-by-thread cross at the cross end of the warp. A paddle is just a bit more efficient than fingers and you can work with more than four ends, which is the maximum you could use with fingers.
Indeed, if you set up a rigid heddle (the hole-and-slot kind found on rigid heddle looms) instead of a paddle to make the crosses, you could wind even more threads than the paddle allows.
FALSE CROSS WITH A SINGLE END
Also, a false cross will occur if you wind incorrectly with only a single end. I have tried to use a lime-green line to indicate the path the thread would take if you made the cross correctly. Clicking on the photos will result in a larger and clearer picture of the lime-green line.
After making the cross (correctly shown by the actual crossed red threads on the right), you draw the yarn (now the lime-green line) straight across to the top of the peg on the left, go around and under that peg under the peg to its right and than continue with the making the second half of the cross.
 Some people do not do this. And some people do it correctly but occasionally make a mistake. The mistake is shown in the following photo, again indicated by the lime-green line. Here, instead of continuing with the yarn straight across, the yarn is brought to the underside of that first peg, then around it to the top, then back to the right and down to the underside of the second peg on the right.
MULTIPLE ENDS WITH NO FALSE CROSS
Anonymous asked another question:
"Peg, please describe in detail how the false cross occurs, I just can't figure it out. I almost always wind warps with multiple ends "in-hand" and have never had or seen a false cross."
I am afraid I can't explain how the false cross occurs. The next time I make a warp I will try to analyze what is actually going on.
What I can't figure out is why you don't get one! My guess is that you are literally carrying the ends "in-hand." I interpret that to mean that you are treating them as a single yarn. What this would mean is that you are not separating out the individual ends to make thread by thread crosses but are treating them as a single end and so making a group cross. Making a group cross would create no problem of a false cross between those first two pegs.
Saturday, March 22, 2008
INTERESTING POSTS FROM OTHER WEAVING BLOGS
Here are a few posts from this past week's weaving blogs that I particularly enjoyed:
Adapters for winding Cones -- Sandra's Loom Blogg.
Draft for Mixed Warps -- Weaverly
Designing Woven Fabrics -- Dot's Fiber to Fabric
Multiple Tabby Sampler Off the Loom -- Leigh's Fiber Journal
Class 101: How Not to Warp Your Loom -- Deep End of the Loom
Red and White Check Towels -- Fun With Fiber
Friday, March 21, 2008
WARPING WORK STATION WITH COFFEE

I make my warps in my sewing room. My warping board rests quite casually on top of a built-in desk and leans against the built-in bookshelves. (This was clearly a child's room in an earlier life.) On the floor you can see the four cones and above that, in front of the warping board, you can see the warping board clamped to the desk with a C-clamp.
HOW MANY ENDS IN A BOUT?
For this warp I am winding six individual bouts of 60/2 silk. And I am winding from four cones. Now comes the trick question: how many ends in a bout?
First, I want the bouts to start and end at the same place. That place can be either the top or the bottom of the board. Since I start winding at the bottom, of the warping board, I make my cross at the top. That means that that is the part of the warp bout that I slip the rod into. If I were to end the bout at the top, I would have four loose ends there. Nothing to slip the rod into.

CROSSES AND FALSE CROSSES
Here at the top right you can see the cross. The funny cross thing at the left is called a false cross. If you wind one end at a time, you shouldn't get this false cross. But as soon as you start winding multiple ends at a time, you get it.
This false cross should not create a problem. The only thing I have to remember is to put the rod through that first big opening on the left. I will discover, as I raddle, that I have loops that hang free of the rod. Then I have to carefully put them back on, making sure I get all the loose loops.
Also, I have to factor in to this calculation the fact that each total round (bottom to top and back again) results in 8 warp ends having been created. This means that the total number of ends in a bout must be divisible by 8.
SIX BOUTS WITH DIFFERENT NUMBER OF ENDS
Figuring out all these things, I have had to make the bouts with two different numbers of yarns. Four bouts have 96 ends each; two bouts have 88 ends. Arithmetically challenged, I took quite awhile to work this out and then to double-check my figures.
The coffee cup is very important in this process.
A QUESTION
What if, despite the best of calculations, I have one or more bouts that I simply cannot make end where they began? With these I just close my eyes to the problem, and wind back to the beginning anyway. This would, of course, give me more warp ends than I needed.
What to do? After threading, just drop those extra warp ends off the back of the loom.
P.S.
I do other weaverly things in this room as well. To the left, where you see just a corner of an orange chair, is the area where my cone- and ball-winding takes place. Also my skein winding. You can go here to see the cone-winding process.
Related Post: More on False Crosses
Thursday, March 20, 2008
WASHED CRACKLE SAMPLES


Here are two views of the washed crackle samples as they hang over my loom. The colors on both pictures are really accurate. The lighting in each case was different, and the colors look different in those different lightings.
THE CUT-OUT PHOTO
The cut-out happened because I had to do a significant rotation of the image, which resulted in strange things happening. I used the free form selection tool to cut out the image. I kind of like the effect, but someday I'll have to learn how to handle this a bit more professionally.
THE SAMPLES
As for the samples themselves, they clearly suggest many possibilities. But for lightweight things, I like the drape better when I use 20/2 cotton for all the wefts. For placemats, jackets, etc., the 10/2 wefts would work nicely.
CURRENT PLANS
What I am now working out are the plans for using the reds and blues section, treadling polychrome style for one of the scarves. The other section I am using is not clear in this photo. But it will consist of blues and tans treadled Summer and Winter (tromp as writ) style.
Related Posts:
Tromp as Writ Varied
Crackle Treadled as Summer and Winter
Polychrome Crackle with Blue Weft
8 Crackle Blocks on 4 Shafts, Continued
Wednesday, March 19, 2008
INSPIRATION FROM QUILTING
Working from another computer (mine is in the "hospital" again, sob......), I have no images, weaving info, blog ideas, etc., available to me. That does not mean I am not working, however! I am making the warp for the next scarves. And I have made decisions about the weaving. More on those when I have my computer back.
Meanwhile, I just wanted to chat a bit about quilts. I am not particularly a quilt lover. But I have found interesting occasional quilts which fall into the art quilt bracket. These quilts are usually geometric or freeform in design style. And these quilts generally make use of color in ways that intrigue me. Sometimes the presentation of the quilt is what calls to me.
Today I accidentally ran across the website for Studio Art Quilt Associates. I was enthralled by their gallery. Even though quilting and weaving are quite different arts/crafts, I find many of these art quilts stimulating my weaving imagination. I recommend a look.
Related Post: Fiberart International 2007
Monday, March 17, 2008
INTERESTING POSTS FROM OTHER WEAVING BLOGS
These are some of the weaving blog posts I found particularly interesting these past two weeks:
Multiple Tabby Weaves -- Leigh's Fiber Journal.
Handweaving in Eng land - 1939 -- Dot's Fiber to Fabric
Out of the Closet -- Weaving Spirit
Delicate Dimensions -- Cyber Fiber Scriber
AVL 24-Shaft Loom -- Jasmine Weaver
Giselle's Gallery -- Eloomanator
Finished and Washed -- Deep End of the Loom
Wet Finishing -- Skiing Weaver
The Amazing Jacquard in Melbourne -- Curious Weaver
On Labels -- Meg Weaves
Thursday, March 13, 2008
READY TO CUT OFF

Here is where I decided to stop. The apron is about half way from the back beam to the heddles. The shed, when I weave, is getting smaller. If I had been desperate, I could have woven a few more inches. But I was pleased with what I had done. So I cut if off.
Related Post: End-of-Loom Weaving
Wednesday, March 12, 2008
Carter Smith and Road Blocks
How many of us have had the experience of weaving something or knitting something we thought a total flop but years later accidentally coming upon it we thought it quite wonderful? I certainly know that I have occasionally experienced this.
Apparently the great figures in textile arts are not immune to this experience.
In the January/February 2008 issue of Fiberarts, there is a very good interview with Carter Smith. Carter Smith is not a weaver, but he is an innovative dyer and creator of amazing pieces to clothe the body. Check out his home page to see some of these pieces.
In this issue of Fiberarts, he talks about his two-year break from dyeing. The break began when he believed that he had gone as far as he could go in his fiber art.
But he did return to it. He explains how he had accidentally seen one of his old pieces and responded positively to it, much as we have found ourselves occasionally responding to an old piece.
He returned to dyeing with new energy and with no concerns for making money. Instead, he proceeded with questions like this: "How do I follow this energy? how do I follow this path? What's the next question?" (p. 45.)
This is only the beginning. He has much more to say, including comments on finding one's own style and dealing with difficulties of having limited studio time. I recommend getting a copy of this issue and reading the whole thing.
Related Post: Style and Originality
Tuesday, March 11, 2008
END OF THE WARP

TROMP AS WRIT
Here are two different treadlings. The blue and yellow at the bottom of the image are crackle blocks tromp as writ.
For me, the really nice thing about this particular bit is that using only two colors allows me to see exactly what is going on with each treadling and also makes it quite clear where blues or yellows dominate. This, hopefully, will provide useful information when I actually start to weave something other than samples........
POLYCHROME TREADLING
The two yellow and green blocks are polychrome treadling (one treadle after the other and repeat). In the first block, green leads and yellow follows. In the second block, yellow leads and green follows.
I was frankly surprised that any kind of design showed up. But it did!
The green bit at the top is simply polychrome treadling but with only one color, certainly not very "poly-"! It's only real function is to keep the fabric from ravelling until I can get to the sewing machine and zigzag the beginning and ending edges.
Related Posts:
More Polychrome Treadling
Polychrome Crackle with Blue Weft
Eight Crackle Blocks on Four Shafts: More Polychrome Treadling
Tromp As Writ - Observe the image in this post and compare it to the image in the
current post. The only different is that the fabric in this post is woven with 10/2 pearl
cotton for the pattern weft; while the fabric pictured in the current post uses 10/2 pearl
cotton for the pattern weft. Both use 20/2 pearl cotton for the binder wefts.
Author's note, throwing up her hands---Blogger is going to do whatever it wants with shaping this last statement. I give up!
Monday, March 10, 2008
DESIGNING PLAIDS AND COREL PAINTER
I happened to run across an interesting tutorial for Corel's software called Painter. No, I don't have the software. I found it as a result of some link or other. The tutorial tells you how to use Painter to design both simple and complex plaids. Go here to have a look.
You can downlowd a 30-day trial here to test it if you are curious. I'm kind of curious........ Too bad it costs so much money!
You can downlowd a 30-day trial here to test it if you are curious. I'm kind of curious........ Too bad it costs so much money!
TROMP AS WRIT VARIED

YARN WEIGHTS
This time I have used 20/2 pearl cotton as both pattern and binder weft. This is not at all traditional. The heavier weft is traditional. But I like the results. Indeed, I have been liking the results of weaving with 20/2 so much that I have put off dyeing the wefts because I am not sure that I will be using a heavy weft for pattern when I turn to the silk. Before I make a final decision, I want this sample off the loom, washed, and pressed so that I can better evaluate the differences.
COLORS
I used six colors, rotating them so that with each new treadling block, I dropped one color and added another. The colors I used were a darkish blue, orange, yellow, a slightly blued green, yellow green, and aqua.In the case of this tromp as writ treadling, I like the rather misty effect that has happened.
MISTY EFFECT
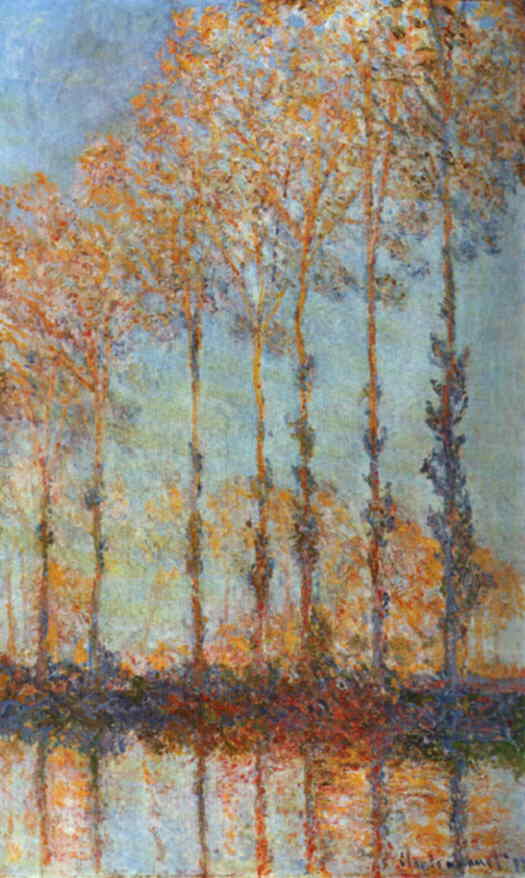
This misty effect is quite the opposite of my more typical work. Go here, for example, to see a picture of what of the earlier samplings on this warp. Or here for a photo of one of my favorite crackle scarves. These images are much more typical of my work. The misty effect of this latest sampling reminds me just a bit of some of the foggy kinds of paintings that Claude Monet did.
This is a good website to view some of Monet's paintings. Check out especially Poplars on the Epte and Rouen Cathedral.
I have always adored the impressionist painters. Is this love beginning to enter into my weaving? We shall see.
TREADLING
I defined the treadling pattern as "tromp as writ." Actually, that is not strictly true, for I did not take the treadlings in order. Instead, I alternated treadling blocks till I finished the sequence. Then I returned to the beginning to pick up the remaining omitted treadling blocks.
To read a bit more on tromp as writ go to Heritage Yarns . Scroll down to near the bottom of the page and you will find a good disucssion of this in terms of overshot threadings.
Related Post: "Tromp as Writ"
Friday, March 7, 2008
CRACKLE THREADING REVIEW
For those who have just dropped in (or not) and have no idea what is going on at this moment, here is the crackle threading I am using. It is a threading which creates 8 blocks while using only 4 shafts.

If you are at all familiar with 4-shaft crackle, you probably wonder, what the..........? Here is what the usual 4-shaft crackle threading is more likely to look like:

This second threading is standard 4-shaft crackle threading. The first is not.
That first threading is not original with me. I learned of it in a book by Zielinski. To learn more about this unusual threading, go to a couple of earlier posts:
8 Crackle Blocks on 4 Shafts
8 Crackle Blocks on 4 Shafts Continued
If you want to learn a bit about the more usual 4-shaft crackle, try this post:
Threading 4-Shaft Crackle
Thursday, March 6, 2008
MORE POLYCHROME TREADLING

I while back I wove polychrome on this warp. Then I used 10/2 pearl cotton for weft. This time I have used 20/2 pearl cotton for weft.
THREE COLORS CHANGING
In each block I used three colors, just as I had in my earlier explorations. But these explorations are more complex than the earlier ones. Now,, each time I moved to a new block I have (somewhat) systematically dropped one color and added a new one, keeping the other two the same.
The first block (beginning at the bottom uses blue, orange and aqua. The next block uses green, orange and aqua, the next block uses blue, green and orange, the fourth block uses aqua, blue, green, and so on.
I rather like what I see happening The result does not quite work as a whole, but it does encourage me in this kind of exploration.
WARP RIB EFFECT
One thing to keep in mind is that the red warp alternates (unintentionally!!!) 10/2 and 20/2 pearl cotton . One of the effects of this is a slight lengthwide ridged/ribbed effect. This effect is most noticeable when touching the fabric.
Also observable is that in some places the warp goes way into the background and is hardly noticeable. That is when the treadling causes the 20/2 warp shows on top. But when the the treadling causes the 10/2 warp to come to the top, the red warp is much more noticeable. Something to play with another time, perhaps.
Related Posts:
Polychrome Crackle with Blue Weft
8 Crackle Blocks on 4 Shafts: More Polychrome Treadling
8 Crackle Blocks on 4 Shafts: More Polychrome Treadling
8 Crackle Blocks on 4 Shafts Continued
Wednesday, March 5, 2008
SHUTTLE RESTS

Here are the two shuttle rests I made for my loom. They are held onto the loom with C-clamps, one on the right side and one on the left side. They are different sizes only because I found the pieces in the odd lots at Home Depot and I simply guessed what size needed.
The one on the left is larger and holds fairly easily three shuttles. The one on the right and, as you can see, easily holds only two shuttles. Sitting on it are two pattern shuttles. Sitting on the web itself are two binder shuttles. It is fairly simple to keep these four shuttles in order.
I never answer the phone when I am in the midst of a sequence.
Related post: Resting Shuttles
Tuesday, March 4, 2008
LOOM IMPOSED ORDER
Not long ago I received an email from Robert Genn which ended with the following quotation from Francis Bacon:
Great art is deeply ordered. Even if within the order
there may be enormously instinctive and accidental things,
nevertheless they come out of a desire for ordering and for
returning fact onto the nervous system in a more violent way.
One of the things about weaving is that by its very nature, it seems automatically to impose order on the final piece. The ordering I am talking about is the ordering imposed by the straight lines of the warp and the straight lines of the weft.
I am always struggling, it seems, to overcome the ordering of this loom imposed grid. I am always trying to find ways to overcome this rigidity. I am always trying to get "instinctive and accidental things" into my weaving.
SAORI WEAVING
This is why, I suspect, many people are drawn to Saori weaving. This is weaving that is based on improvisation and lack of planning. Bonnie Tarses had a go at this a while back and posted her experience on her blog. Go here to read about it. For an excellent introduction to saori weaving, go here.
Meg Nakagawa recently posted on fluidity in other arts and some of her consequent frustrations with weaving as an artist's tool. Go here to read her post on Art-Form Envy.
TAPESTRY WEAVING
For what might seem to be absolute freedom, I could weave tapestry. I've tried tapestry. I had thought I would adore tapestry weaving. It seemed to be the freest of weaving possibilities. But I did not adore it. Weaving tapestry was not an unpleasant experience. Something was lacking that I needed.
IKAT WEAVING
Ikat is another possibility for overcoming the rigidity of the warp/weft interchange. In weft ikat the yarns are made into small skeins, the width of the warp plus allowance for takeup. They are then tied of with a resist material and dyed. In warp ikat, the parts of the warp are bound with a resist material and then dyed. The ultimate ikat is of course the combination of warp and weft ikat. This requires extraordinary skill attainable only by years and years of experience.
But ikat, true ikat, lovely as it is, does not really appeal to me any more than tapestry does.Ikat, like tapestry, usually results in a piece where the original grid of warp and weft can disappear completely.
THE APPEAL OF CRACKLE
I am beginning to learn why I find crackle so appealing. Why I never weary of it. With crackle I see possibilities for manipulating colors and treadlings so that the grid is less obvious, though still there. I see crackle, moreover, as a structure that allows me to design in the rough an overall piece but also allows me to make final decisions as I actually weave. The crackle blocks become simultaneously a deeply ordered structure and a place for "instinctive and accidental things" to occur.
MORE ON IKAT
For a brief but good description of ikat and photos of some beautiful ikat fabrics, go here.
For examples of ikat being produced by a contemporary professional fiber artist, Candiss Cole, go here. You can learn more about the artist by clicking on the side link on that page.
POSTSCRIPT
Jun and Noriko Tomita, in their book Japanese Ikat Weaving, say in the opening chapter that ikat is "...the kind of technique which could have been produced accidentally by weavers using unevenly dyed faulty yarn giving rise to unexpected patterns." (p.1 ).
Monday, March 3, 2008
CLOSING IN: THE END IS IN SIGHT

This is a view from the back of my loom. The back rod is ready to go up over the back beam. Before it can do that, however, I need to remove the raddle. The raddle is currently sitting on top of the back beams, and the prongs on the raddle are facing towards the back.
RADDLES
The raddle is by LeClerc and has half-inch spaces. It is very versatile, but it is not the only raddle I have. I also have a raddle with one-inch spaces made by Schacht. This raddle dates back to my early weaving days when I was making rugs. I wove them at a very low epi.
I also have a home-made raddle with quarter-inch spaces. This is probably the one I use the most. It is a little difficult to use, however, because I did not pound all the nails in exactly straight! To be truthful, some of the nails are really really crooked. Perhaps I shall post a picture someday.........
FLOATING SELVEDGES
Hanging off the back of the loom are two colorful knitting intarsia bobbins. I use these to wind on the floating selvedges. The white shoelaces hold some light weights which I attach to the bobbins. This way I can weight those selvedge threads as heavily as I need to.
Saturday, March 1, 2008
HEMMING FABRICS
Leigh has just published a really good post on hemming fabrics. On an earlier post, she had asked people how they hemmed their woven pieces. She collected all those answers and put them together, with her own comments, in a very readable format.
Go here to check it out.
Go here to check it out.
Subscribe to:
Posts (Atom)


