Thursday, September 30, 2010

CROOKED CONE

Posted by Peg in South Carolina 

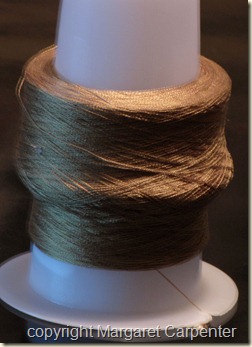
Cone crooked wound

Well, it’s not the cone that is crooked;  it’s the winding. 

When I got to this point, I could no longer turn the handle.  Something was jammed.  I am not a mechanic.  Still, I took the cone off the winder, turned the winder upside down in my hand.  I looked through the tiny opening and it seemed to unmechanical Peg that there were bits of threads caught in the gear mechanism.  What to do?

Could I take it apart to get at the gears?  I saw 4 screws on the bottom. I removed them and proceeded to pull the bottom of the winder away from the top.  But it wouldn’t come apart.  Was there something else I could do? 

I’d had this (relatively) inexpensive winder for close to 10 years.  I knew I wouldn’t feel badly about buying a new one.  But I was still determined to try to get it back into working order.

I could not find another way to separate them into the two pieces.  But, there was enough of an opening that I could clearly see the threads caught in the gears, but not enough of an opening for even one finger to slip through.

I tried a long beading tweezers, but even that was too wide.  So I took a crochet hook and poked around until a thread came to where I could grab it either with my fingers or tweezers.  Then I pulled it out of the gear.  I did this any number of times, pulling out not only threads but bits of dust ball sort of things.  Finally, the gear mechanism seemed to be clean of any garbage.

I put a fresh cone on, attached the thread, took the handle in my fingers and turned.  It turned freely.  It wound out correctly.  I am so proud of myself!

Crooked Cone” was written by Margaret Carpenter for Talking about Weaving and was originally posted on September 30, 2010. ©2010 Margaret Carpenter aka Peg in South Carolina
Wednesday, September 22, 2010

WHY I RAN OUT OF HEDDLES

Posted by Peg in South Carolina 

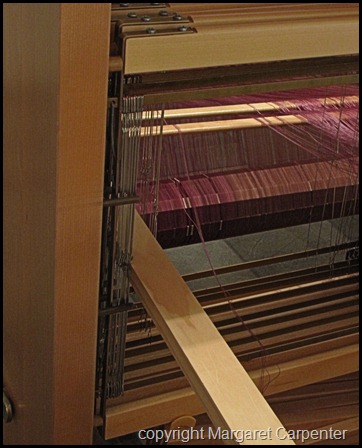
Today I cut off the right side of the initial weaving. Then I tied the previously sleyed ends of the right side in bow knots so that they would not slip through the reed as I sleyed the left half.  So far so good.

Then I began sleying the left side.  I hadn’t gotten very far when I ran into a clump of empty heddles on shaft 2.  Oh dear. I don’t know how I managed to do that!  But at least I know why I had to add all those heddles on shaft 2 at the end of the threading.

But what to do now?  Do I rethread yet again?  I decided that there was no way I was going to do that.  I decided to leave those empty 8 heddles on.  Because of where they are in relation to the threading, i don’t think they will cause a problem when I weave.  And if they do………….off with their heads!  The monetary cost of 8 heddles is hardly worth all that re-threading!

Related Post:  Adding Heddles – Take Two

Why I Ran out of Heddles” was written by Margaret Carpenter for Talking about Weaving and was originally posted on September 22, 2010. ©2010 Margaret Carpenter aka Peg in South Carolina
Wednesday, September 15, 2010

ADDING HEDDLES – TAKE TWO

Posted by Peg in South Carolina

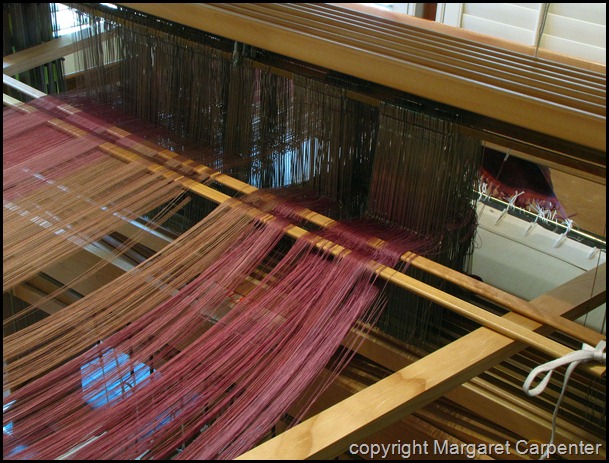
I am done threading, but the warp didn’t let me off easily.  When I got to the last block, I discovered I needed 8 more heddles on shaft 2.  Huh?  I didn’t need them when I originally threaded this side?  Obviously, I have done some things differently. Did I make other mistakes in my first threading?  Or did I make mistakes this time?  It will be interesting to see what happens when I start weaving.

Also, irony of ironies, the first time I threaded this project, I discovered at the end of the threading that I had to add more heddles. You can read about this at my June 14th post, “Adding Heddles

Adding heddles to a loom is not all that hard.  When the loom is empty.  A warp on the loom makes it, at least for this loom, a much harder job. 
Heddlese at side of loomIn the photo at the left, I have tried to give an idea of how tight things are at the shafts on the left side of the loom. It’s not that there are heddles right up against the left side that is the problem.  The problem is the tiny space between the left side of the shafts themselves and the side of the upright.
Look at the top flat metal runner that slides through the tops of the heddles.  You can see that it ends on the left by slipping through a hole in the vertical piece connect the top and bottom of the shaft.  Just between that vertical piece and the loom upright, barely visible is the gray metal rod that gets clicked into the hole at the end of the vertical piece.  There is barely any room for my fingers to work!

I definitely was not going to remove heddles from an overloaded shaft and move them to shaft 2. I did not want to have to deal with more than one shaft.

So I pulled 8 heddles off a string of heddles that I had not used up earlier.  I pulled them onto two knitting needles, one needle inserted through the tops of the heddles, the others through the bottoms. That is what I normally do when I add heddles.  The knitting needles keeps them neatly in order.

But the space here is much too cramped for the knitting needles.  So I then cut another string and poked the string through the bottom and top of the heddles and tied the ends together in a bowknot.  Simple. 
Then came the hard part:  getting them on the shaft.

That involved getting the runners that the heddles slide onto unlocked from the top and bottom of the shaft and then pulled out of their slots.  A screwdriver for leverage helped quite a bit.  But putting on 8 heddles at a blow in a tiny space with little room for maneuvering was not easy.  One at a time would have been easier.  But I did get them on.  The runners are back in the slots but I could only lock the top one.  I doubt that the bottom will present a problem.

And I am done threading!


Adding Heddles - Take Two” was written by Margaret Carpenter for Talking about Weaving and was originally posted on September 3, 2010. ©2010 Margaret Carpenter aka Peg in South Carolina

Wednesday, September 8, 2010

NEW GLASSES FOR COMPUTER, I MEAN, FOR WEAVING

Posted by Peg in South Carolina
I got a new computer a month ago and also a great big LED screen.  The screen is wonderful, except that I was getting a neck ache because I was lifting up my head so I could read the screen through the lower part of my bifocal glasses.  I knew that the next time I went to the eye doctor, I would have to talk to him about what to do.

But then I got an idea.  What if I got a cheap pair of plastic frames and had the whole lens be the prescription for the reading part of my bifocals?  I went to the store.  And yes, though she was not happy about not having a prescription from the doctor specifically for that.  I practically had to swear in blood that I would not complain if they did not work.

Three days later, I had my glasses.  I can read the computer beautifully with no neck strain.

I can also thread heddles much more easily.  That was a surprise.  That means that sleying the reed will be easier with these glasses as well.

But the biggest surprise was how well I could see all around.  Things are a tiny bit wonky when I look into the distance but still quite clear; so just to get up to go the bathroom or to get something, no need to change glasses.  I am shocked because I am so very near-sighted.  Or at least, I thought I was.  Without glasses, I am hard put to even find the chart in the eye doctor’s office with out my glasses on, let alone try to read any of the letters.
 
I have been told that I have extremely bad astigmatism.  I wonder if, in reality, I am not particularly near-sighted, just stuck with astigmatism!  I will have to ask.

New Glasses for Computer, I Mean, for Weaving” was written by Margaret Carpenter for Talking about Weaving and was originally posted on September 3, 2010. ©2010 Margaret Carpenter aka Peg in South Carolina

Friday, September 3, 2010

RE-THREADING

Posted by Peg in South Carolina

PREPARATIONS

Chuck held warp ends taut and pressed treadles.  I got the lease sticks in. 
You can tell from the tautness and neatness of the threads, those that are still attached to the woven cloth.  And it is clear that these are not tabby sheds.  As I said, you cannot get tabby on this threading.


Rethreading prep from back


The messier side is where the warp ends had been disconnected at the fell and Chuck was holding them.  Though I don’t have perfect tabbies, these sheds, combined with the raddle divisions, should give me a good enough way to make choices when I start threading.
My next step was to pull all those ends out of their heddles. When I did this, I discovered that there were some ends that had not been caught in the lease sticks at all. I was able to use my raddle (still sitting on the back beam) to determine where those ends were to be inserted into the lease sticks.

RE-THREADING MORE DIFFICULT THAN THREADING

So I have begun the threading.  Not quite halfway through.  It is harder going than when I did it originally.  Normally when I thread, I remove the back beam and the cloth beam.  Doing this allows me to get closer to the heddles.  Since, however, the right half of the warp is still attached to the cloth beam, I had to leave both beams in place.  This means some awkward leaning over to reach the heddles.  Not easy on the back.

Sometimes I stand.  Sometimes I sit.  Neither way is perfect but at least it changes my body position.

When I inserted the lease sticks, I did not choose the best sheds.  Not realizing it, I had chosen sheds that always left 3-4 warp ends next to each other either going under or going over the lease sticks.  I am hoping that this will not create a problem when I start to weave.  I worry about sheds not clearing properly.  Only time will give me the answer to this one!

Re-Threading” was written by Margaret Carpenter for Talking about Weaving and was originally posted on September 3, 2010. ©2010 Margaret Carpenter aka Peg in South Carolina